# Import/Export Downlink configuration
This section will help you to import export downlink form configuration in console. You can download the current active configuration of a Device from the device detail page or Configure the device using the Downlink import feature.
# Export
- Navigate to the Console (opens new window) and login with your credentials.
- Open to the Devices page from left menu and select a device to view the device detail page.
- Scroll to the Configure Sensor section, You will see Import/Export buttons under the form as shown in below image.
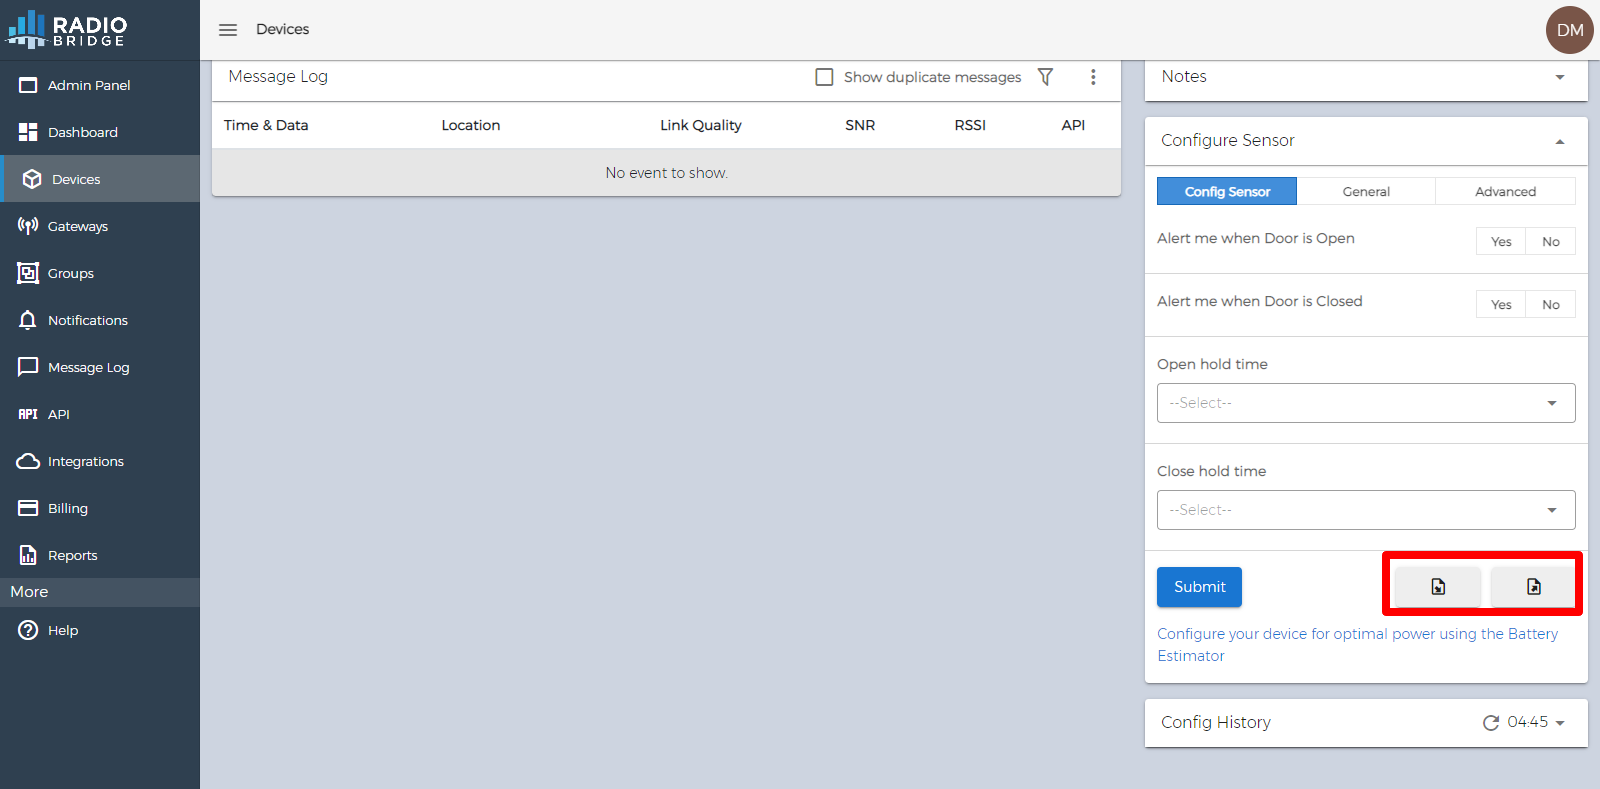
- Click on Export button to download the current configuration for that device.
# Import
- If you want to import a new configuration, We recommend to download the current configuration as it will give a JSON file with all the required fields.
- Open the JSON file in a Text editor and Update the values as per following instructions.
- A sample field structure looks like following JSON:
[
    {
        "field_key": "<key_name>",
        "name": "<Field name>",
        "value": "<value need to be updated>",
        "description": "<instruction & decription about the field>",
         "allowed_values": [
            "<value1>",
            "<value2>"
        ]
    }
]
- You only need to update the "value" field in the downloaded JSON file. Here is the description for different JSON fields in the file.
| Field | Description |
|---|---|
| field_key | The unique key name of the field provided by system, DO NOT CHANGE |
| name | Field name, DO NOT CHANGE |
| value | You can put the new values here, if allowed_values is present then put a value from that list. This is required. |
| description | Field description, DO NOT CHANGE |
| allowed_values | Contains a list of allowed values, If this shows a comma separated list then pick one option from the list to put in value field. |
- Once you are done editing the JSON file, Click the Import button on Console -> Device detail page.
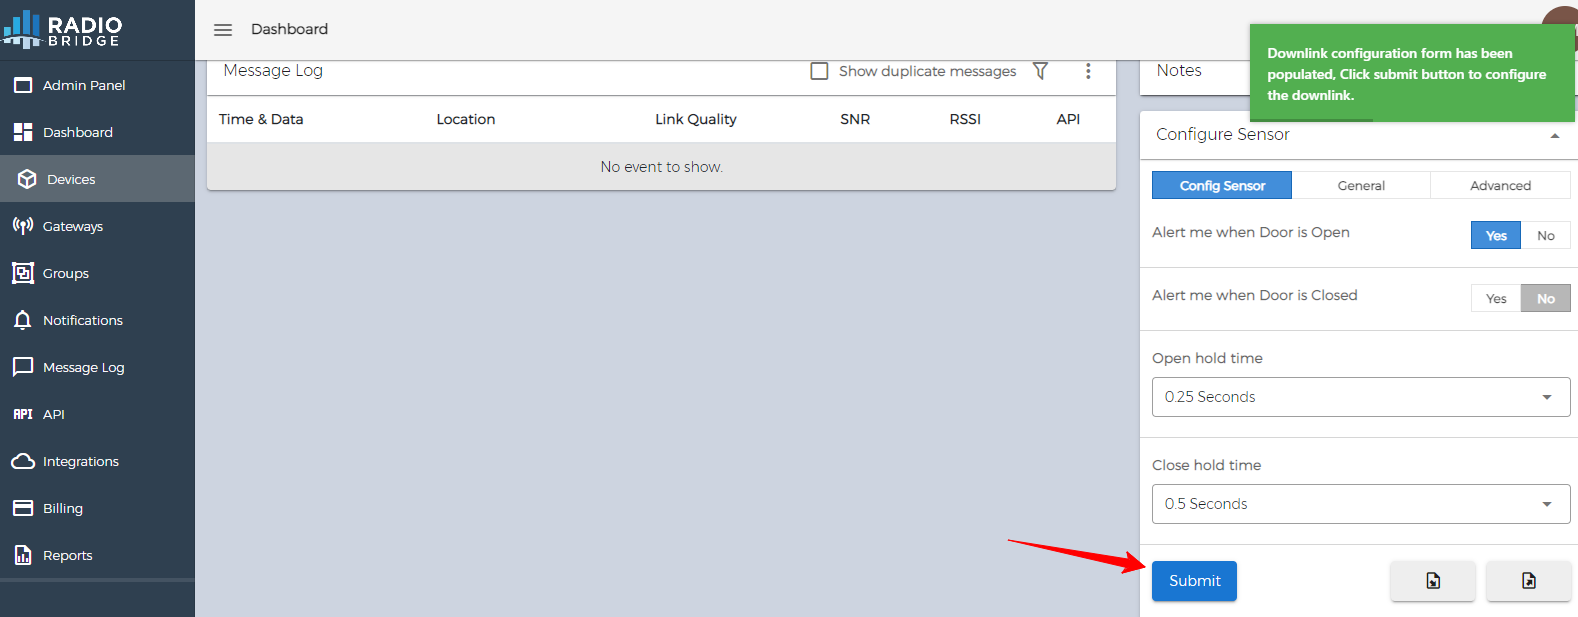
- Select the modified file, and you will notice the current form is populated with the new values. (Depends on how you've placed the values in JSON file.)
- Once the values are populated in the form, You need to click on submit button to Schedule the downlink.
- If the configured values will pass the validation and a downlink is scheduled, then you will see a Success message on the screen.