# Stand-Alone Multitech Conduit AP/AEP
This section describes the steps necessary to connect a stand-alone Multitech Conduit AP or AEP LoRa gateway to the Radio Bridge console. In the stand-alone configuration, the network server is located on the local gateway and a Python script is used to pass messages to the Radio Bridge Console.
You will be following the below steps to connect your gateway and devices to Radio Bridge console:
- Add gateway to the Console
- Update firmware & configure Multitech gateway - LoRa Network server
- Install python script (console package) in the Multitech Gateway
- Add devices to the Radio Bridge Console
- Add devices to the Multitech gateway
# Add Gateway to the Console
Log into the Radio Bridge console at console.radiobridge.com, select the Gateways tab on the left side, and click “Add Gateway”. Follow the menu to select Multitech and give the gateway a name. Click on “Register Gateway” and note the link to the installation script that will be used in future steps.
# Bring the Gateway Online
To bring the gateway online, refer to the standard setup instructions from Multitech. Note that the gateway may default to a static IP of 192.168.2.1.
Be sure to set the DNS correctly in the network setup, as future steps will fail if the DNS is not correct.
# Update Gateway Firmware
Verify that the gateway is running firmware version 5.3.0 or later. If it is not, follow the Multitech instructions for upgrading the system firmware before proceeding to the next steps.
# Enable the LoRa Network Server
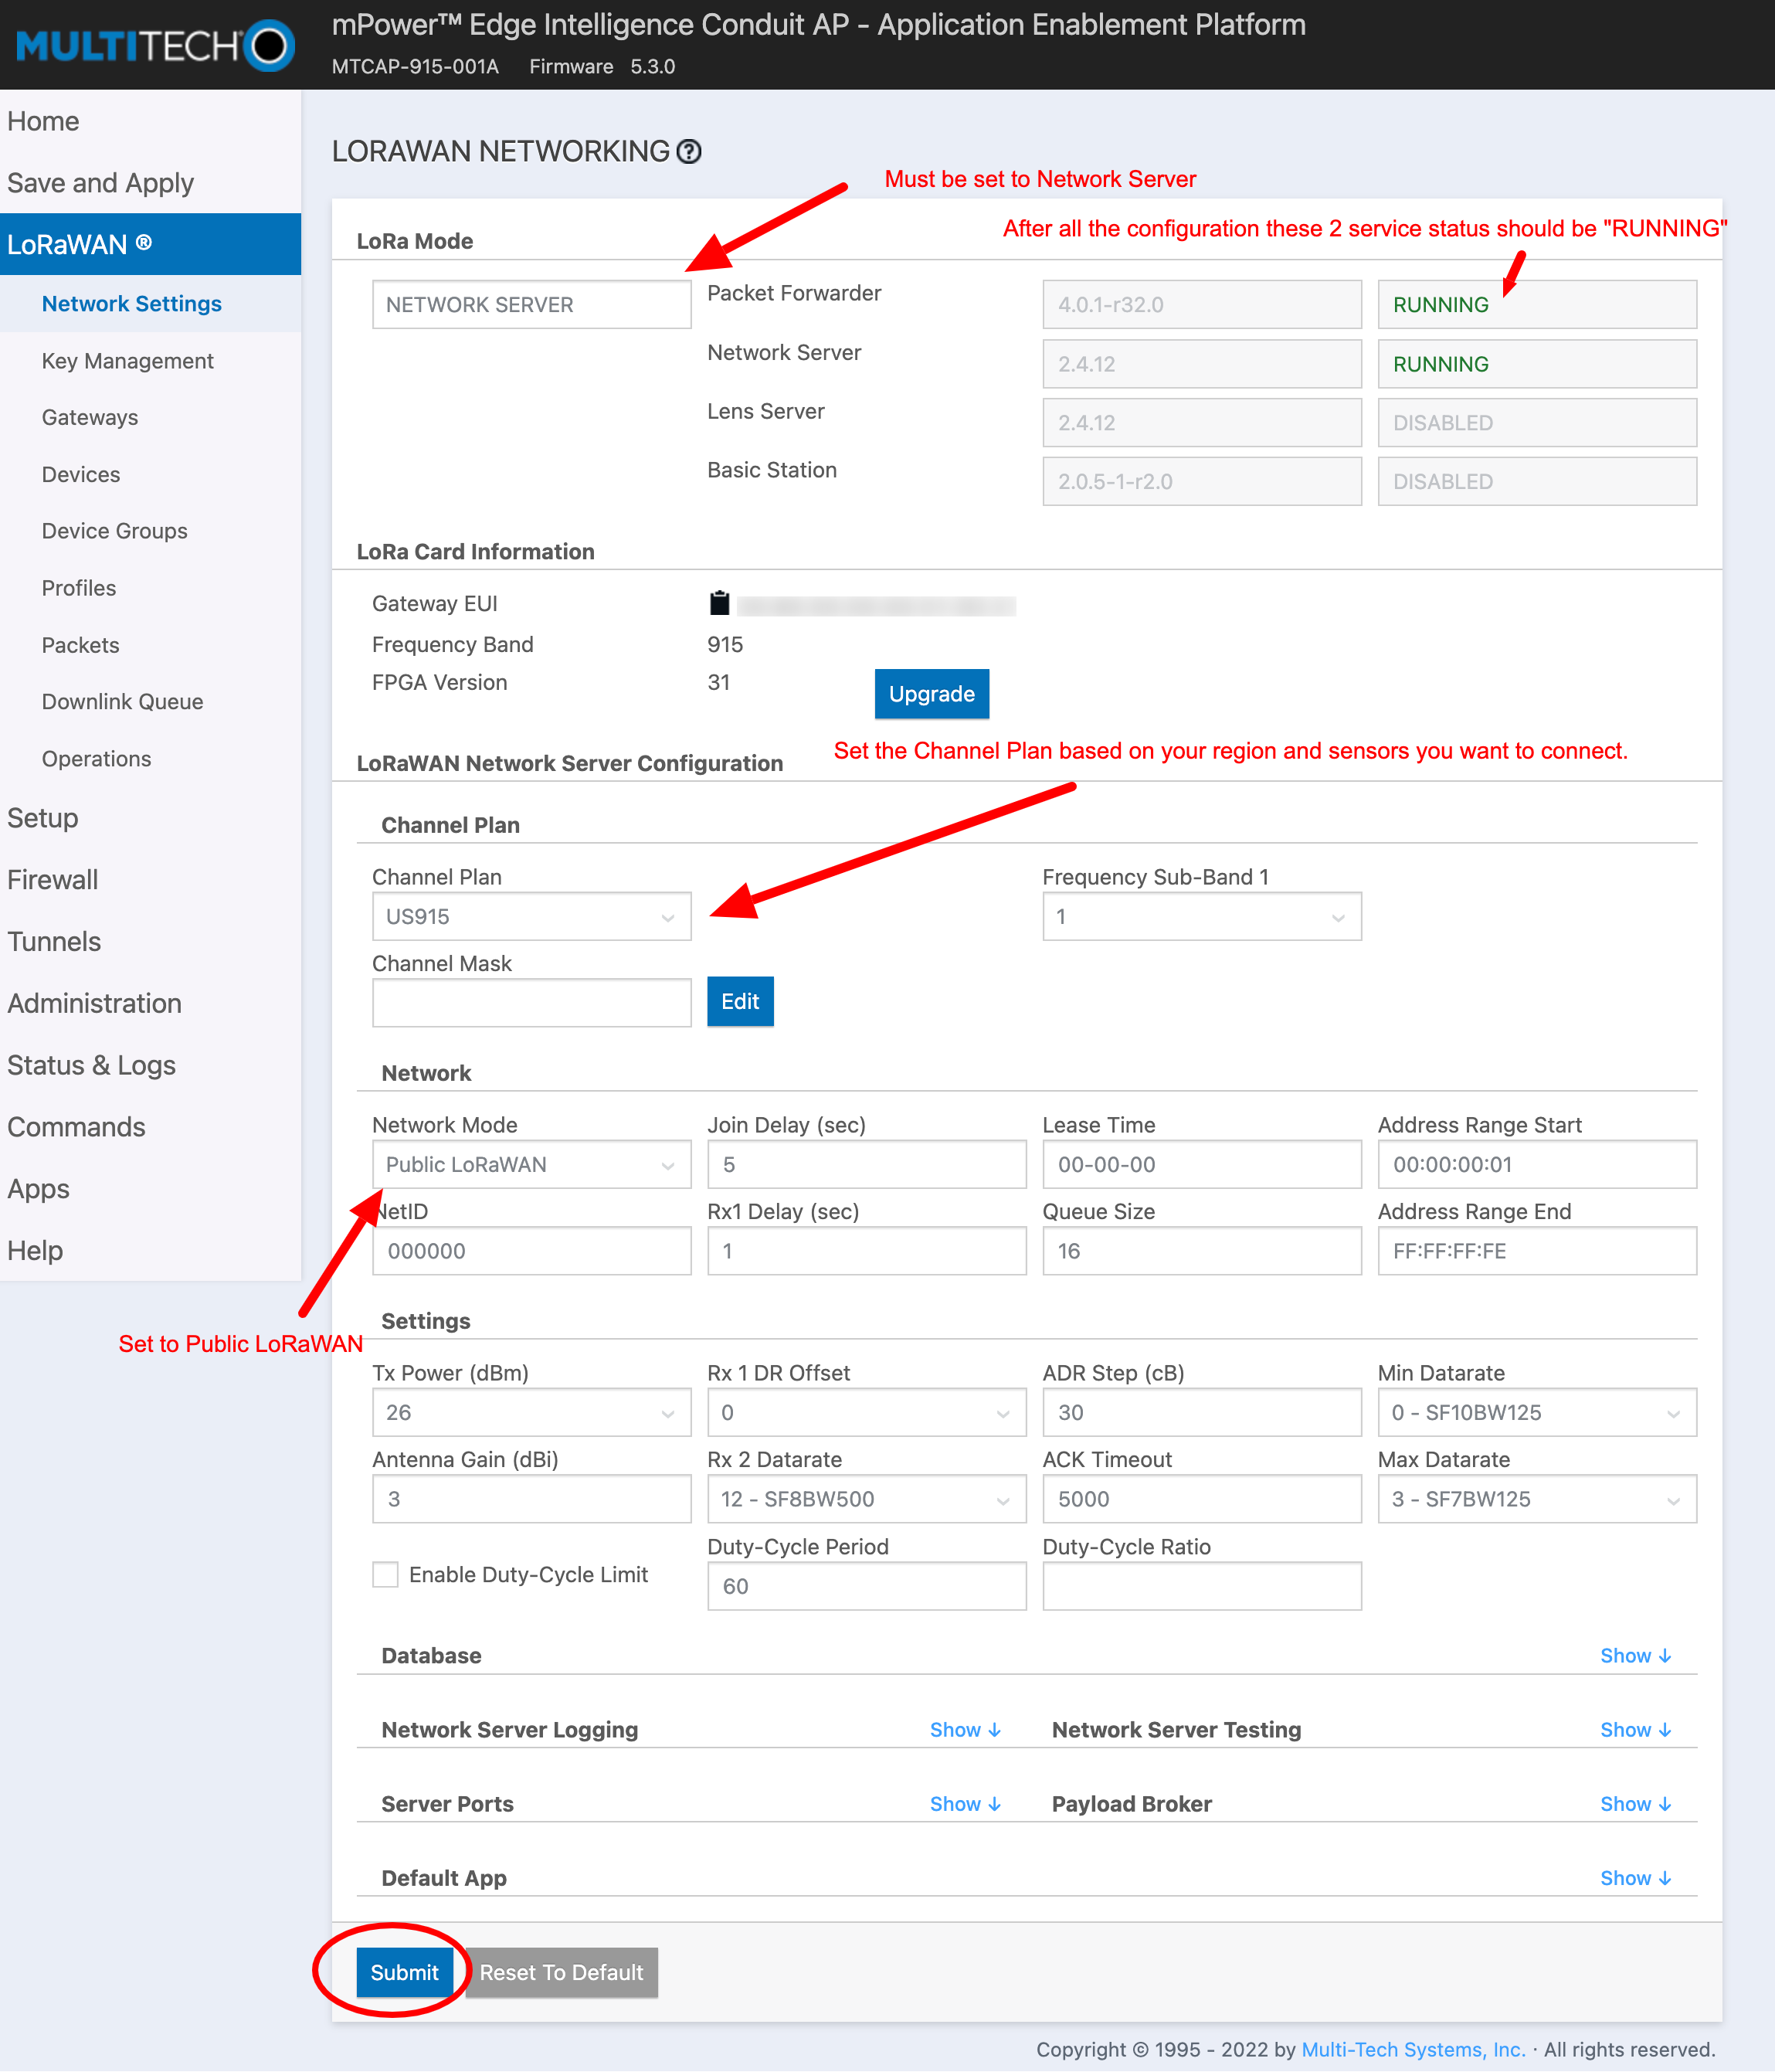
Navigate to the LoRaWAN tab on the left side of the screen, select network settings, and under Mode select “Network Sever”. The default settings should be in the correct state, but double check that the Channel Plan is “US915”, the frequency sub-band set to 1, and the network mode is set to “Public LoRaWAN”. Click on Submit.
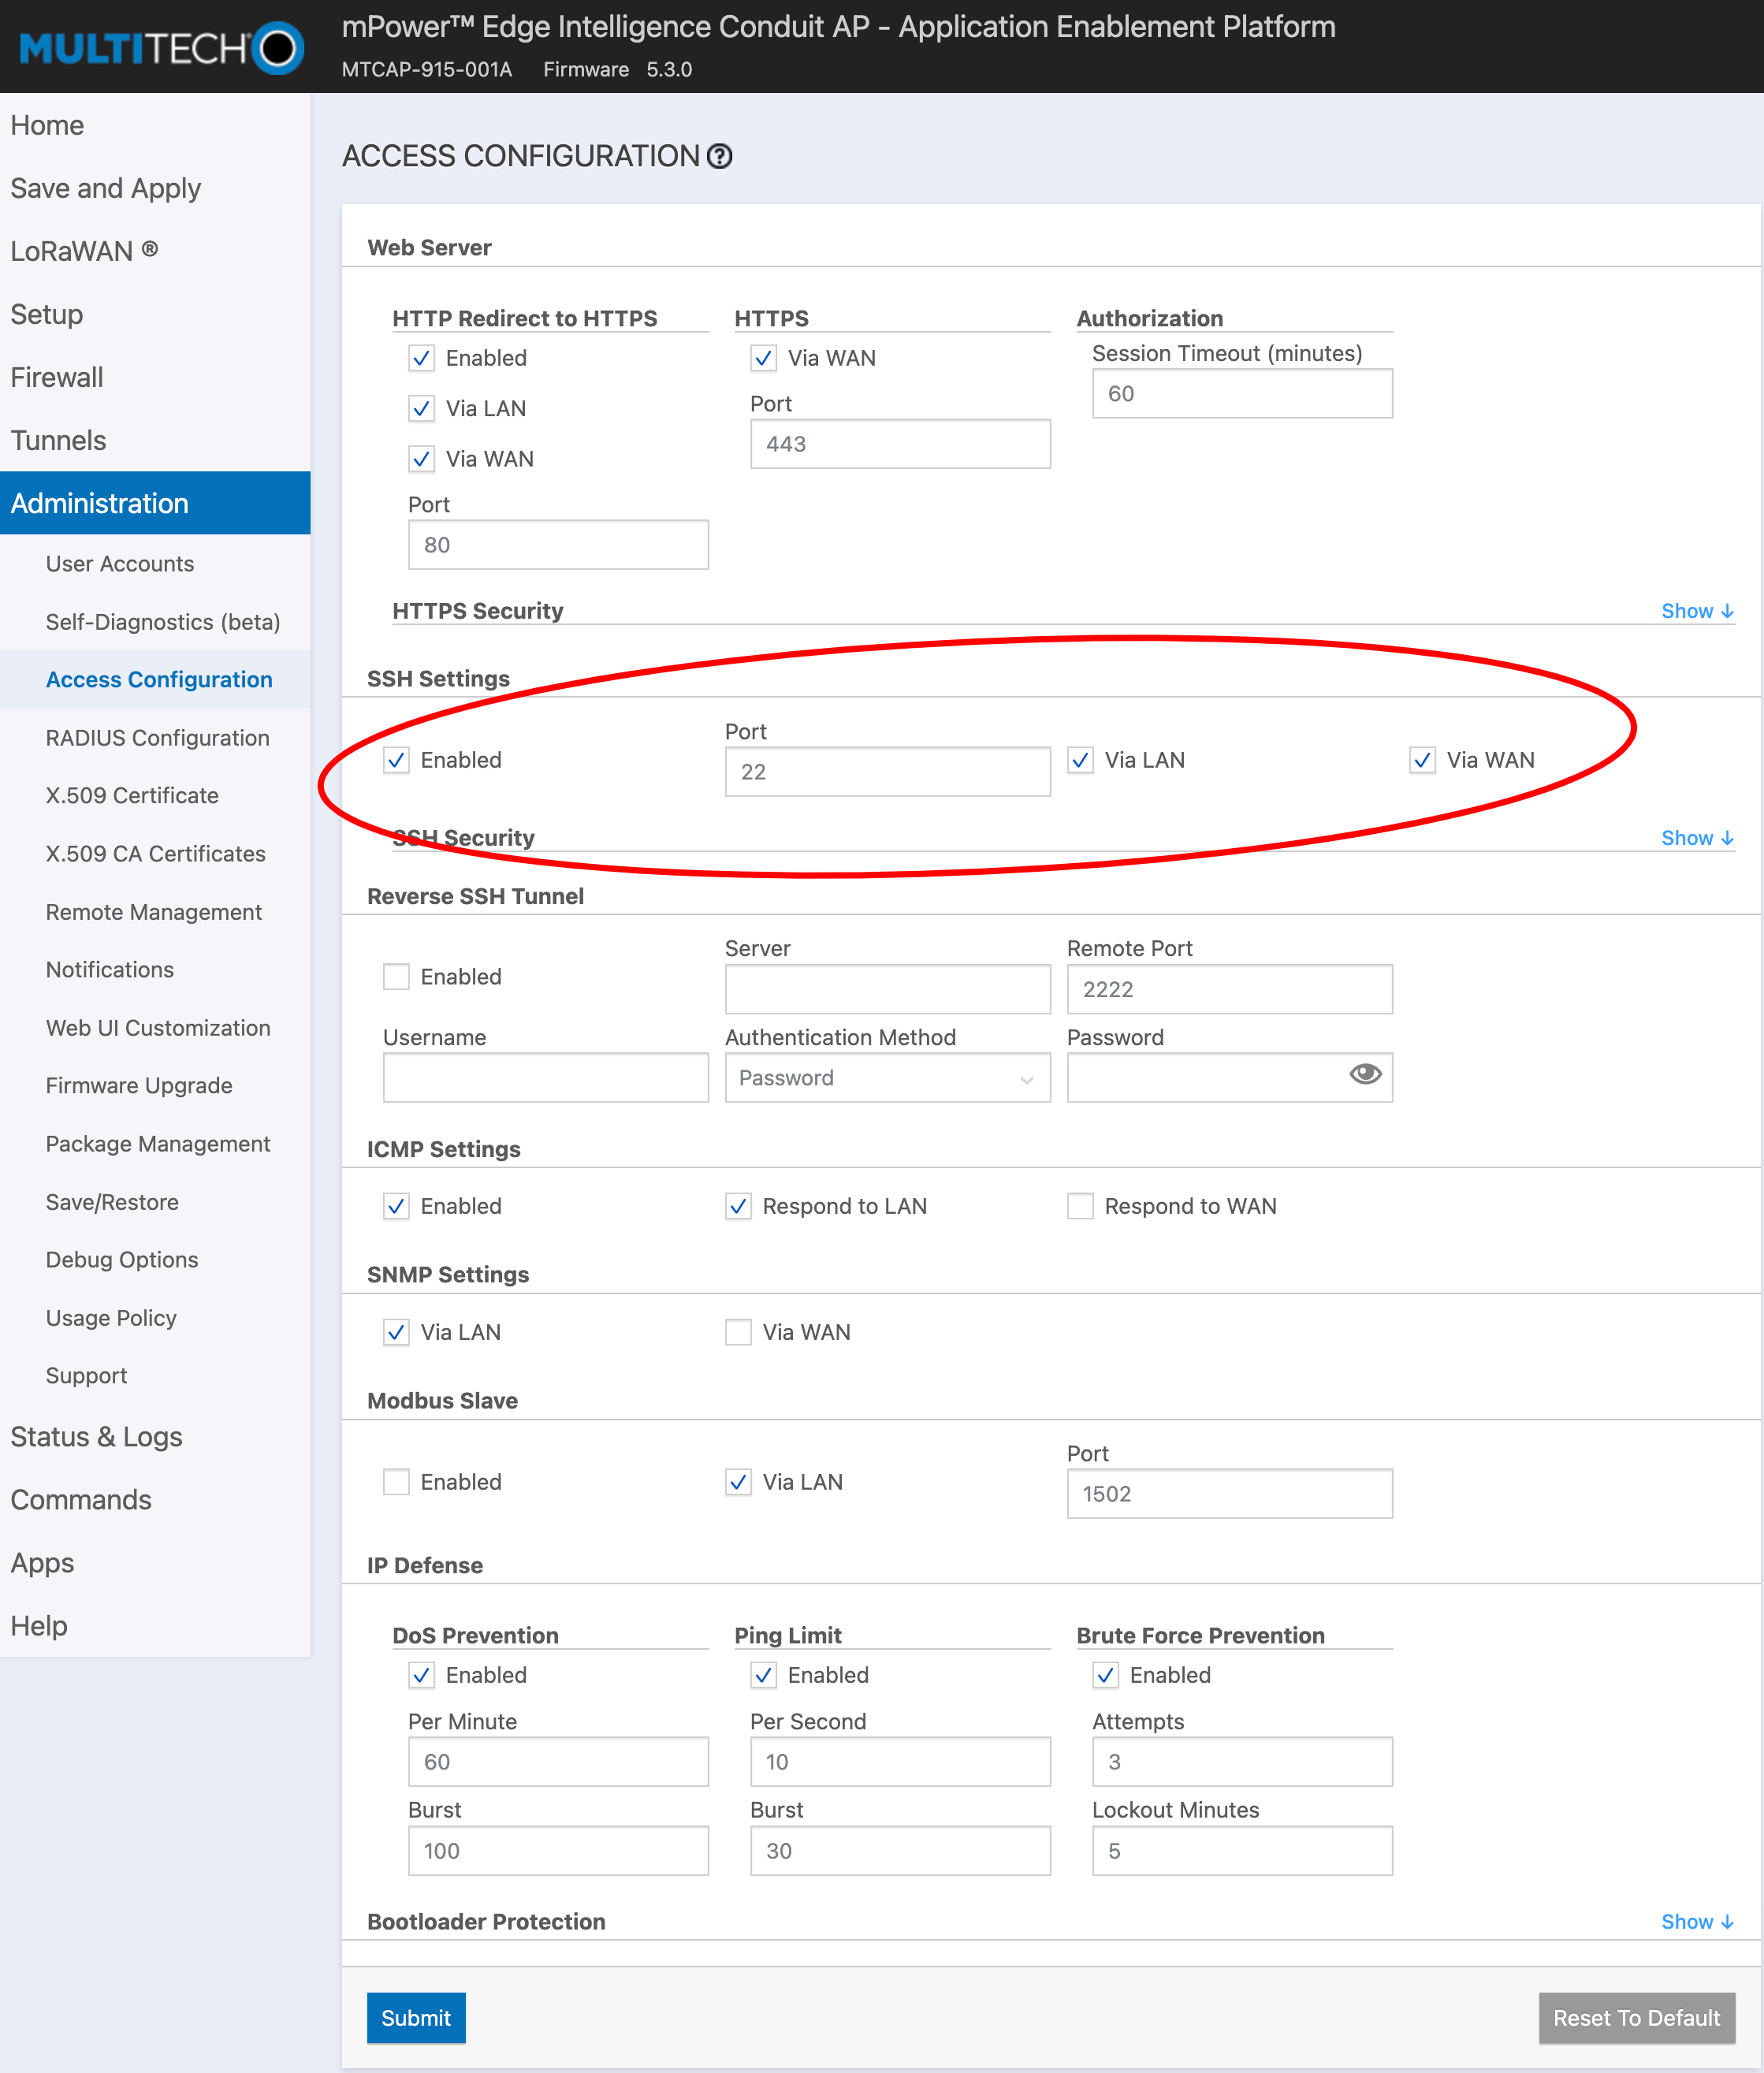
Click on Administration -> Access Configuration and check the box “Via WAN” under the SSH heading. Click Submit.
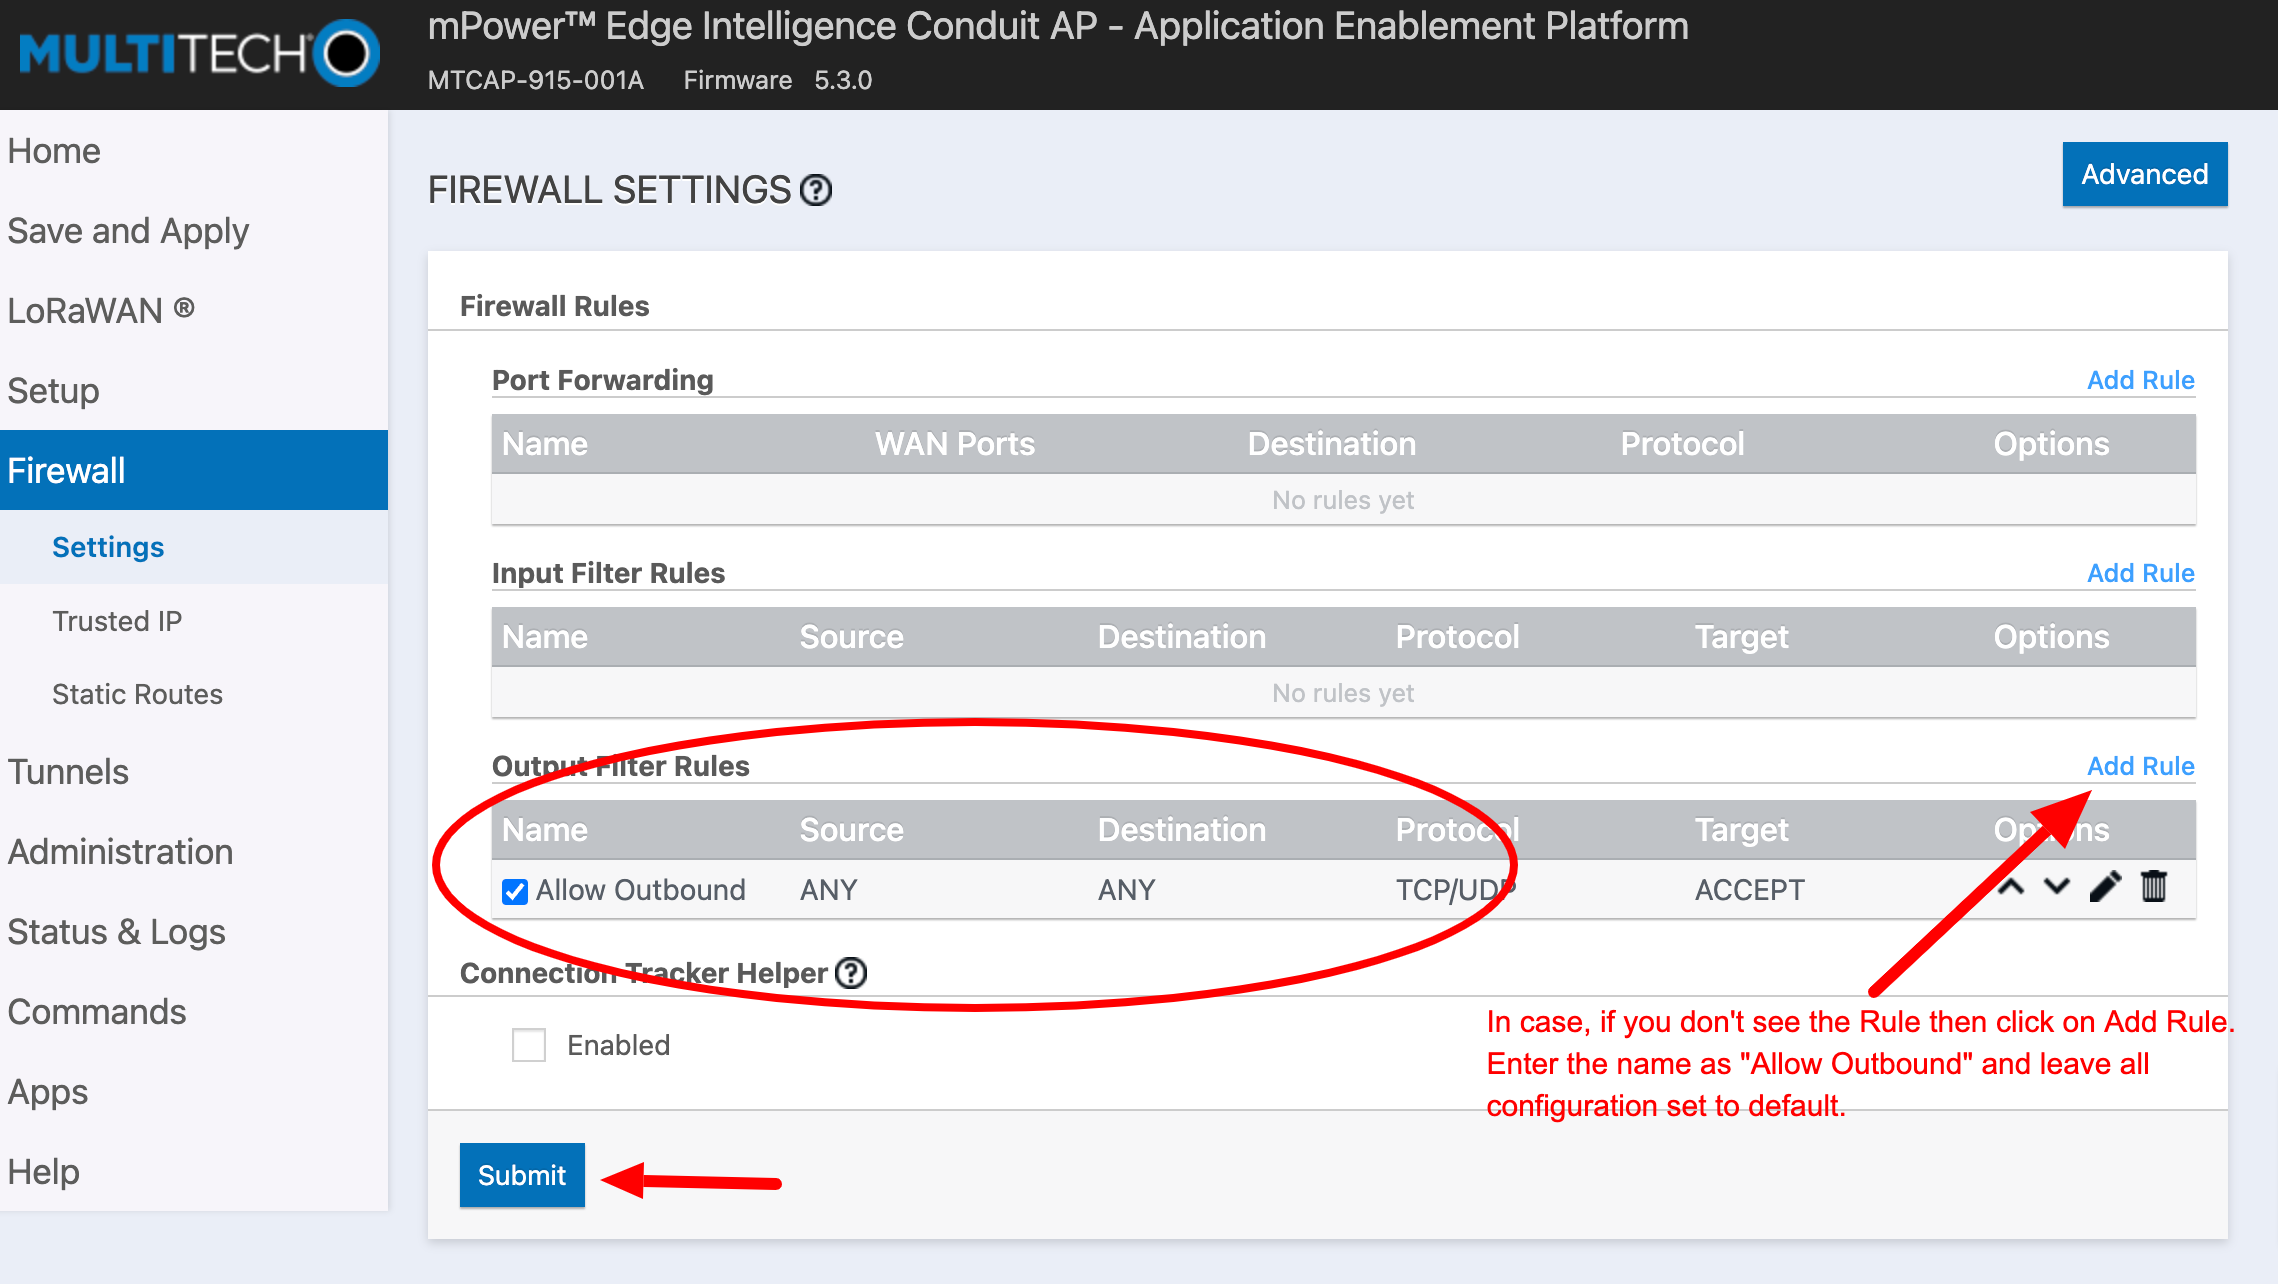
Go to Firewall->Settings and check the box “Allow Outbound”. Click Submit.
Click Save and Apply.
# Install Python Script
Note: Following steps require the superuser access, so you must be allowed to run the sudo commands.
Log into the gateway via SSH. You can use a program such as PUTTY on Windows or the Terminal on a Mac. The command will usually take the form:
ssh <user>@<gateway IP address>
Enable the Superuser terminal & navigate to the home folder.
sudo -s
cd /opt
Now, you need to put the Multitech Gateway installation package to the gateway. Navigate to the Radio Bridge console window, copy the "Gateway setup package" link and run.
wget <gateway setup package link>
Extract the files with the command:
tar -xzvf multitech_sdk.tar.gz
Navigate to the extracted folder and execute the following commands to run the setup:
cd multitech_sdk
sudo chmod +x ./mqtt_gateway.sh
sudo ./mqtt_gateway.sh
sudo reboot
If you are prompted for a password in the above commands, use the admin password set for the gateway. You can close the SSH session.
After the gateway reboots, login through the web interface, click on LoRaWAN, and under network settings verify that the LoRa mode is set to “network server” and the status shows “running” in green.
# Add Devices to the Radio Bridge Console
Log into the console and select the Devices tab on the left side of the page and click “Add New Device”. Select the Multitech stand-alone gateway in the Select Network screen. For the ID and Key, use the numbers found on the sensor label which is the same ID/Key pair entered on the gateway.
Note that this only adds the devices to the console, they will still need to be added to the Multitech gateway. Adding a device to the Console does not automatically add to the gateway, and adding to the gateway does not automatically add them to the Console, so they must be added separately.
# Add Devices to Gateway
As mentioned in the previous step, even though the devices have been added to the Console, they will still need to be added to the Multitech gateway.
Log into the gateway and go to LoRaWAN -> Key Management. Under Location select “Local Keys”.
You can export the devices from Console and upload the device in the Multitech gateway as shown in the below image.
- Export the devices from console.
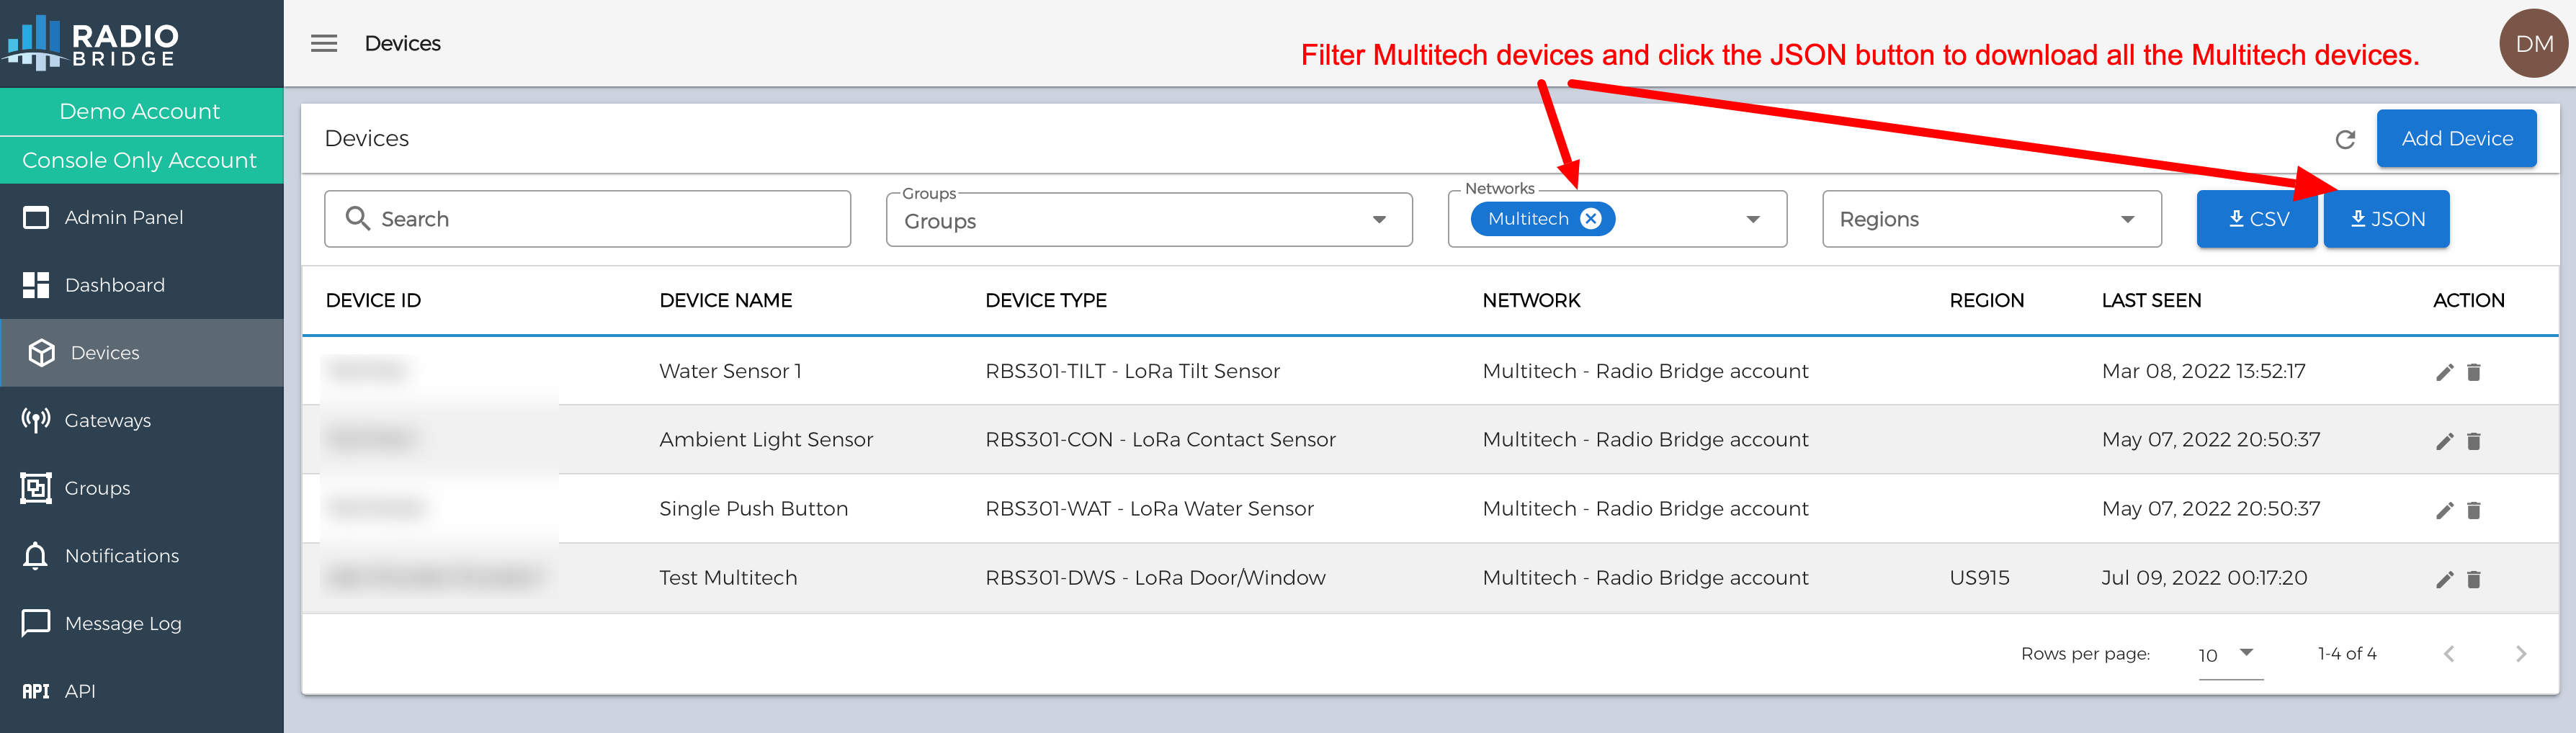
- Upload the devices in the Multitech Gateway.
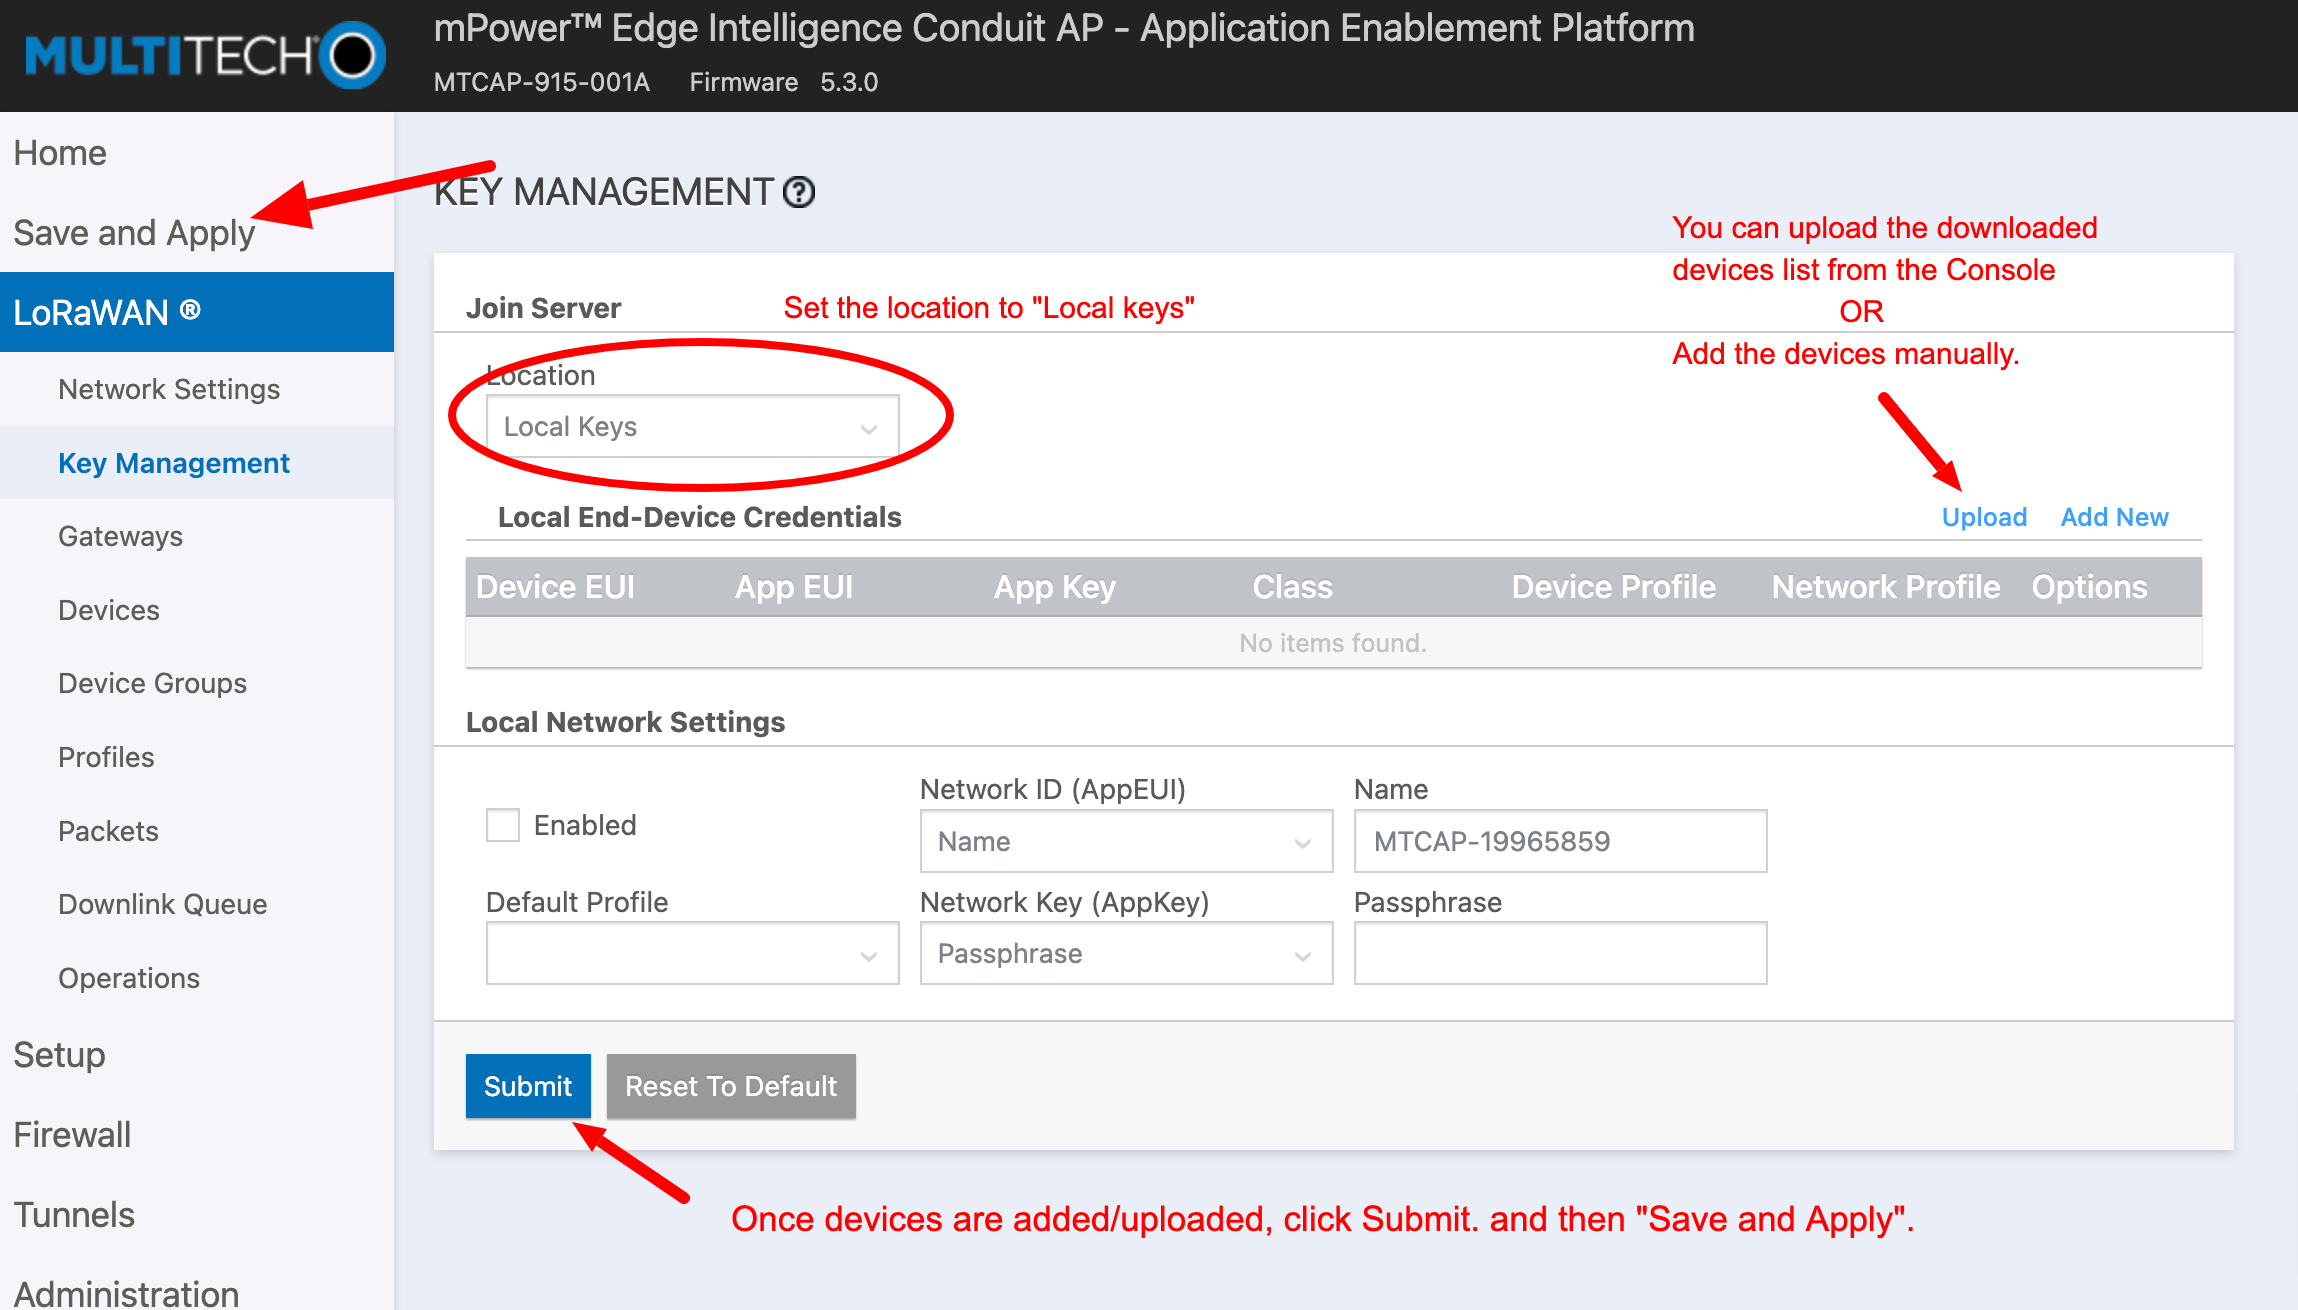
OR
You can add the device manually through "Add New" option.
Enter the fields as shown in the following table.
Table 6: Parameters for Device Setup
Parameter Description Dev EUI The Device EUI listed on your sensor App EUI See section on AppEUI/JoinEUI above App Key Enter the Key listed on your sensor Click OK.
Note: Make sure the Enabled box is NOT checked under Local Network Settings. Once you have added all of your devices click on Submit then click Save.
Radio Bridge sensors can now connect to the console through the stand-alone gateway. Try creating sensor events and verify that you see messages in the console.
# Enable Debug Mode
If you don't see the messages in the Console then you can enable the debugging to view the logs to troubleshoot the issue.
To enable the log you need to modify the console config file. Log in to Multitech gateway via SSH and run the below command to edit the config file:
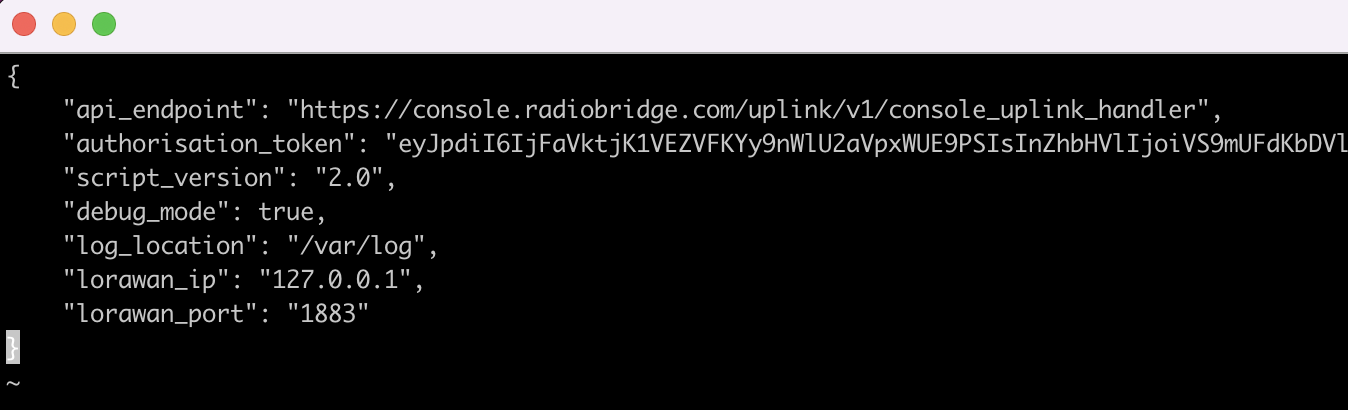
sudo vi /opt/multitech_sdk/console_config.json
Press the i key on your keyboard to enable the edit mode and Change the debug_mode attribute to true. Once done press ESC and then type :wq, press Enter to save the changes. Your configuration file will look like below sample config.
# Start/Stop the service
Run following command to stop the service
sudo /etc/init.d/radiobridge_mqtt_service stop
Run following command to start the service
sudo /etc/init.d/radiobridge_mqtt_service start
# View the Logs
Run following command to view the log on console.
sudo tail -f /var/log/console.log