# Helium
Helium is a blockchain network that leverages a decentralized global network of Hotspots — devices that double as network miners and wireless access points — initially to provide long-range connectivity to Internet of Things (IoT) devices, and long-term to connect anything to the internet via a decentralized wireless network such as 5G.
# Registering Devices through Radio Bridge
The easiest way to add devices using Helium network is to let Radio Bridge register them for you. In this scenario, you don’t need your own Helium account or a direct engagement with Helium. Though, there is a device provisioning ($1/month/device) and data cost ($0.0001/message) associated with registering through Radio Bridge.
Simply log into the Radio Bridge console and select the Devices tab on the left side of the page and click “Add New Device”. From there select the Helium icon and then “Register through Radio Bridge”. Once the device has been added, you will see sensor messages appear in the console.
Note: If you don't see the messages appearing in the console then your sensor might not be in the network range of a Helium hotspot. You can check the Helium coverage through the Helium Explorer (opens new window)
# Data Credits (DC)
RadioBridge gives you 10K Data credits every beginning of the month. If you require more Data Credits then login into the Radio Bridge console and select the Billing tab on the left side of the page and click "Purchase Data Credits".
Note: To purchase the Data Credits we require you to subscribe the Pro/Free plan to add your credit card details.
# Using Your Helium Account
If you are planning to use your own Helium account, this section shows how to link your Helium Console (opens new window) to the Radio Bridge Console.
Navigate to the Radio Bridge console and select the Integrations tab on the left side of the page and click "Setup Helium".
# Helium API Key
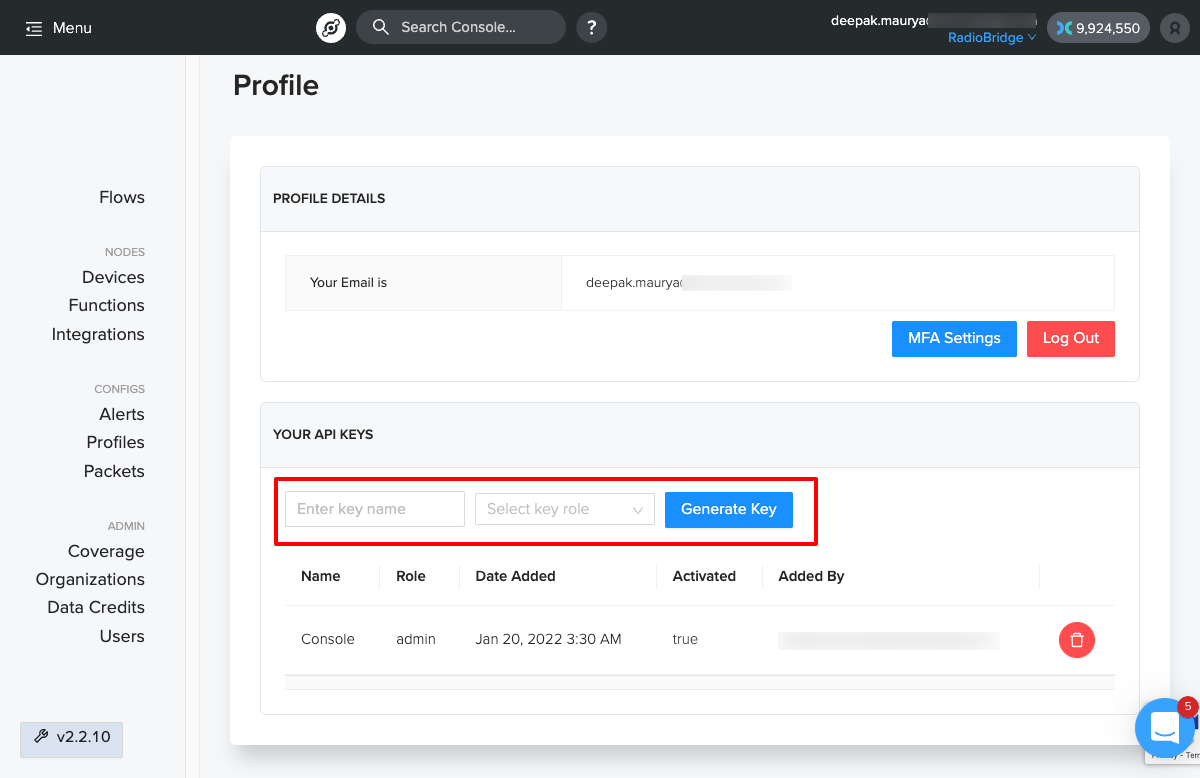
Login into your Helium (opens new window) account, navigate to the My Account (top right corner). Under "Your API Keys" section, Enter the key name & Key role as Administrator, and then Click "Generate Key" button.
# Helium Integrations
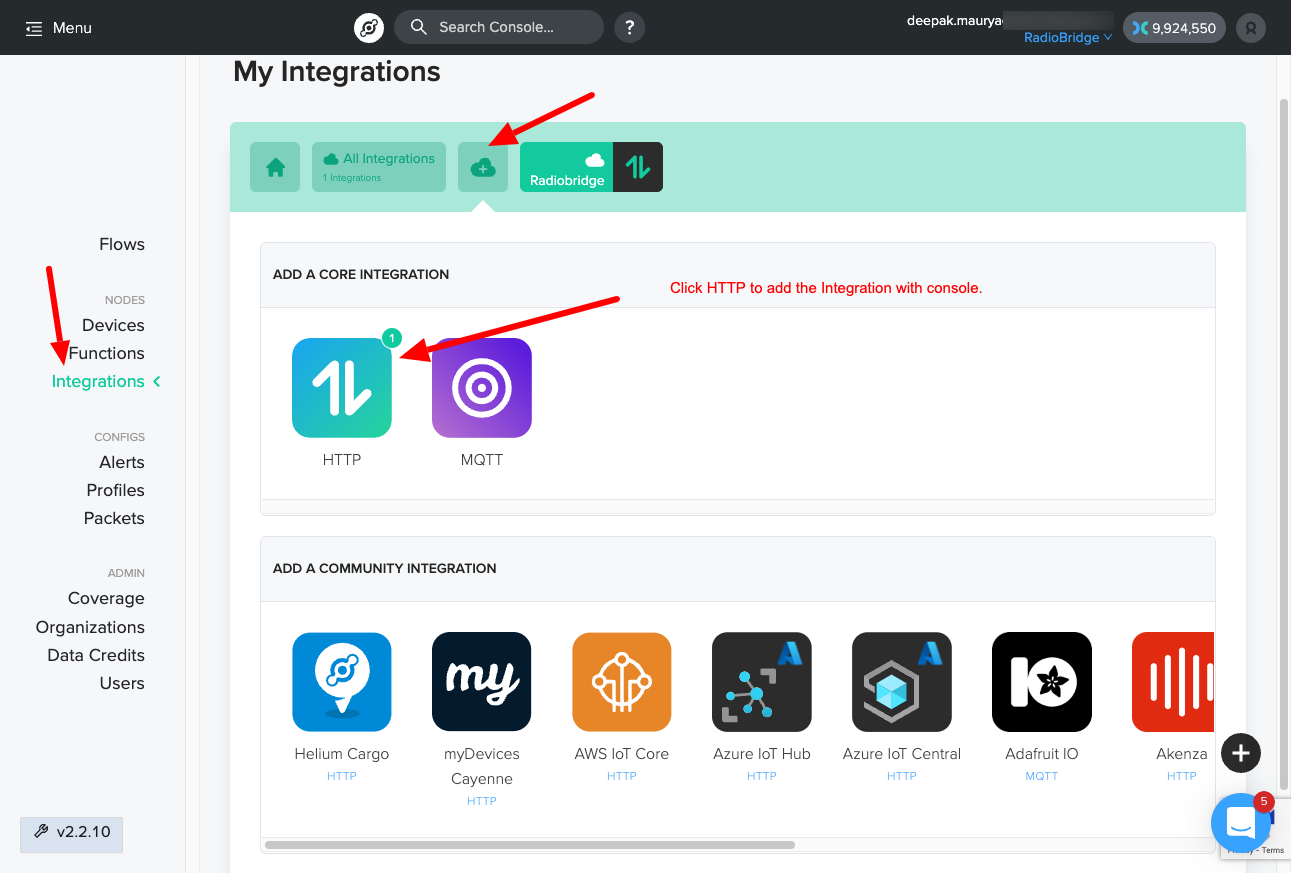
On the Helium window, Click Integrations -> Add New Integrations.
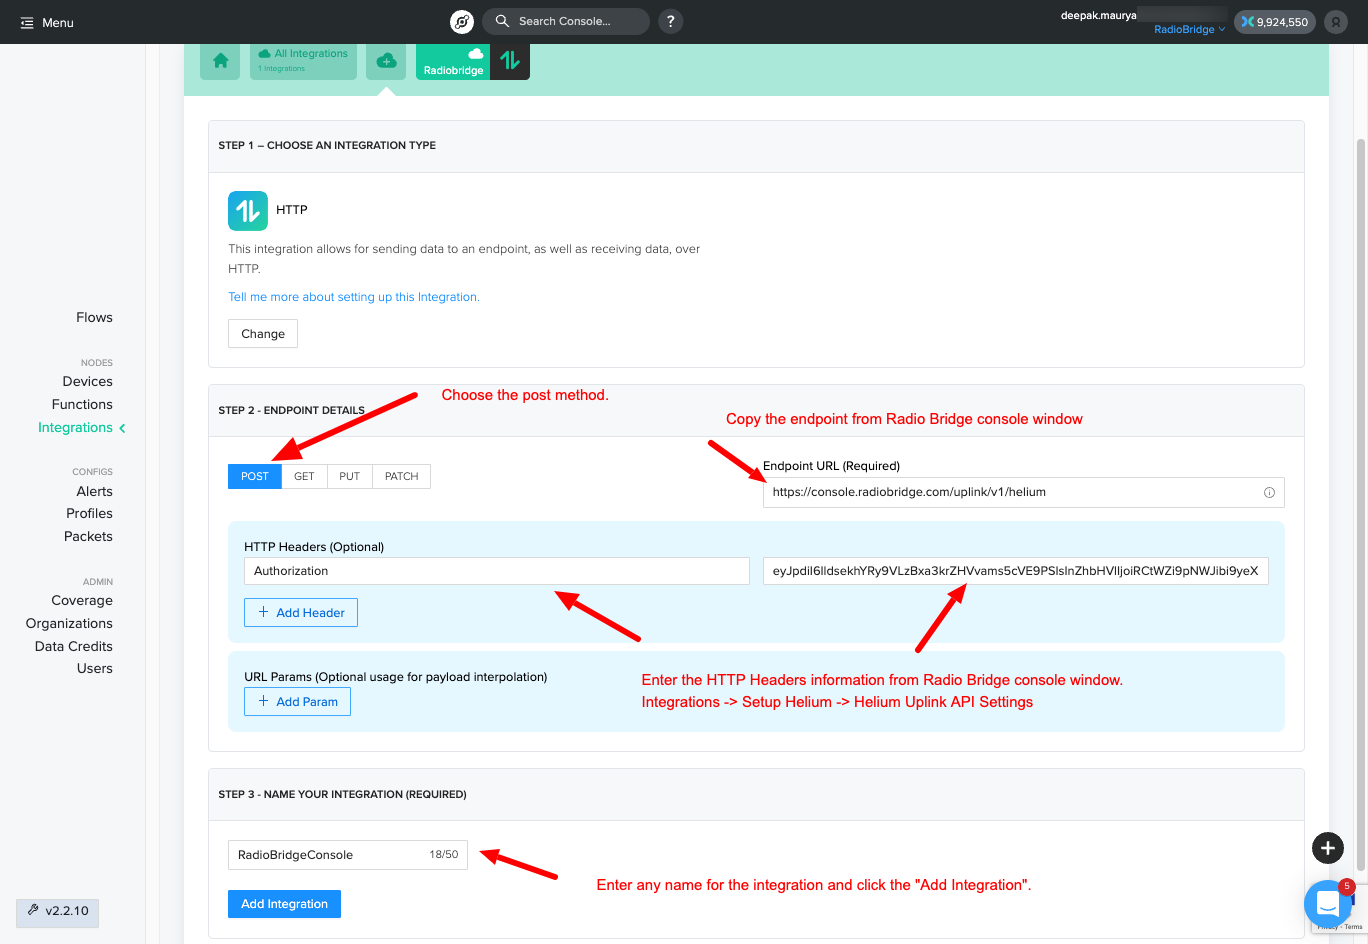
Fill in the Endpoint details as shown in the below images.
# Helium Labels
Helium labels help you to group a set of sensors and setup a flow for all the devices associated to the labels.
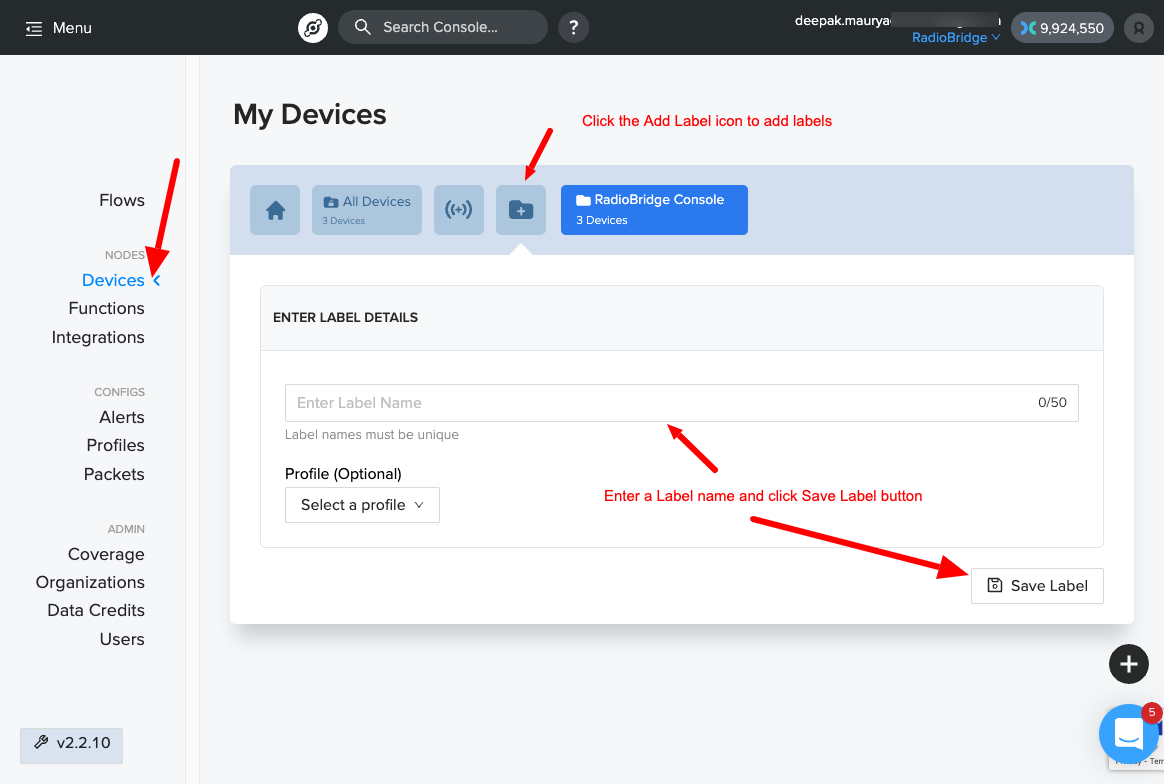
On the Helium window, click Devices -> Add New Label
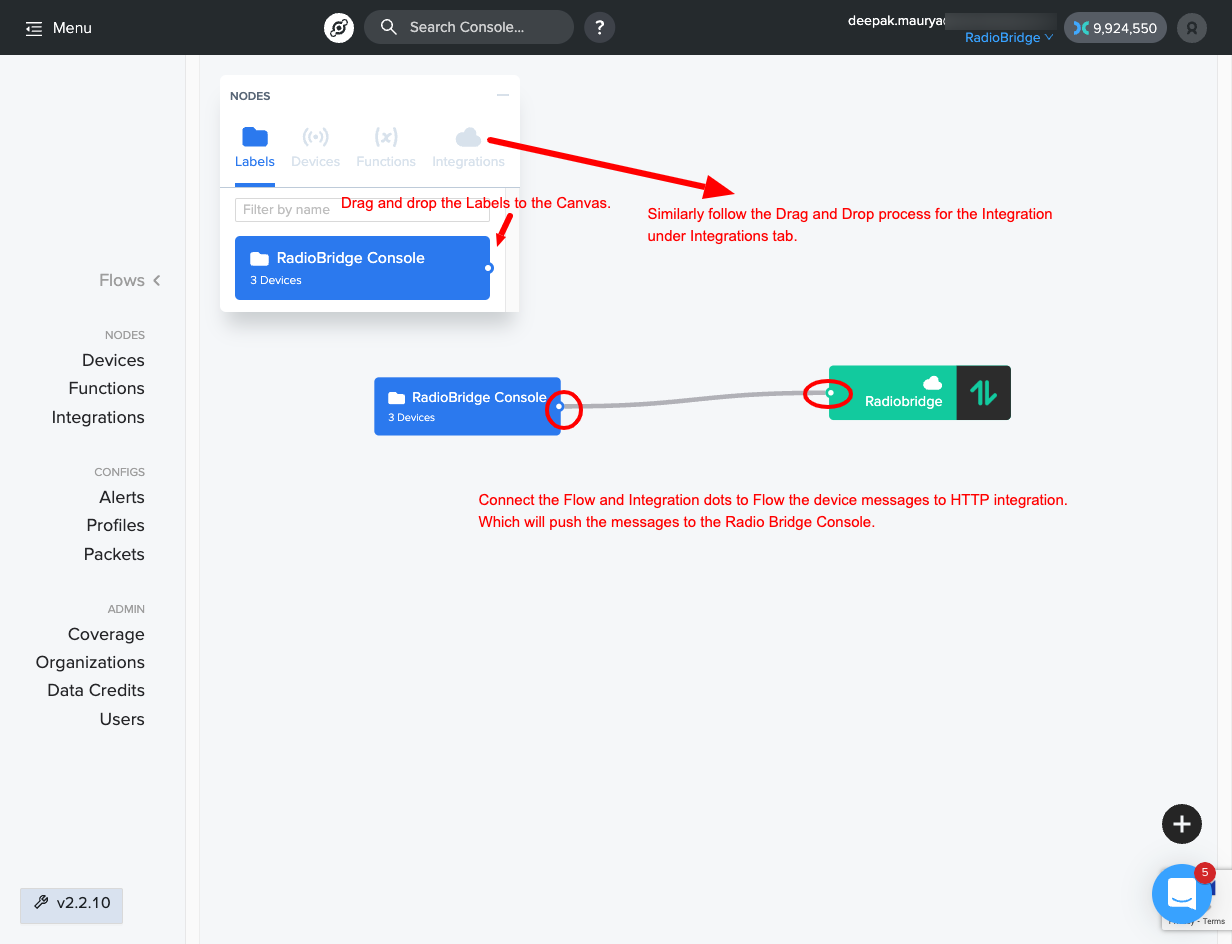
# Helium Flows
On the Helium window, click Flows from left menu and follow the instructions shown in the below screenshot.
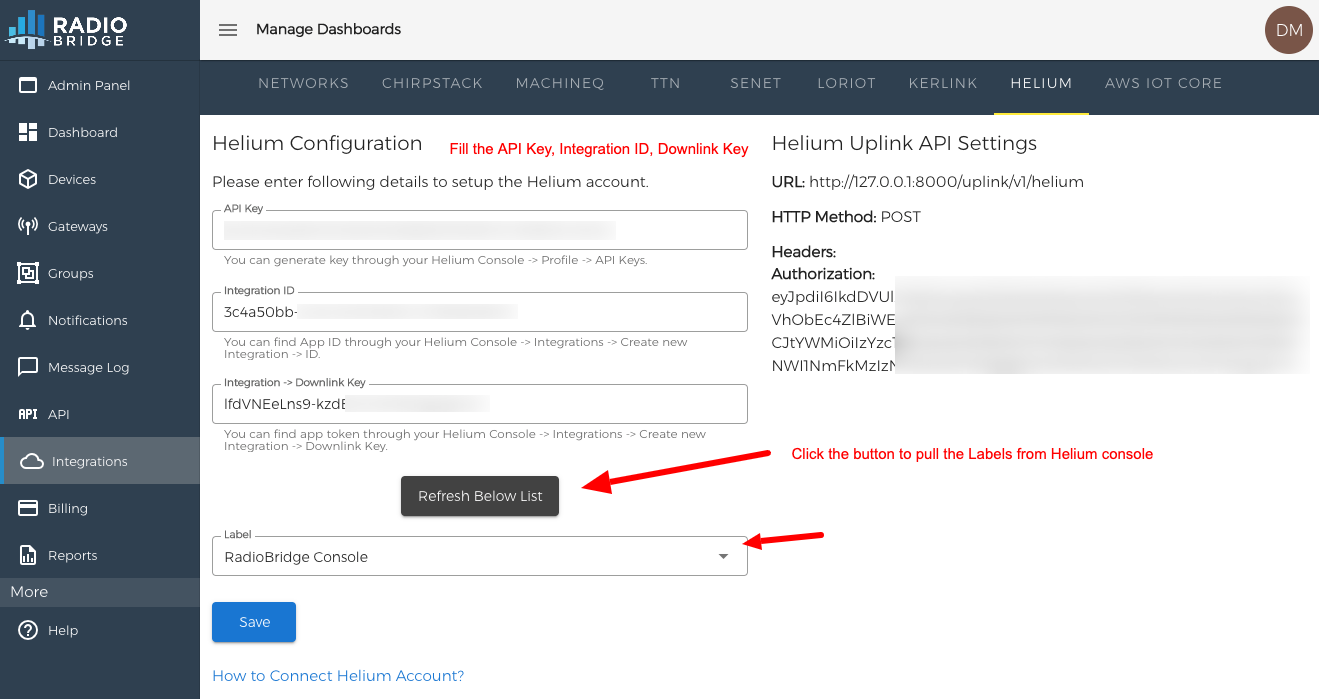
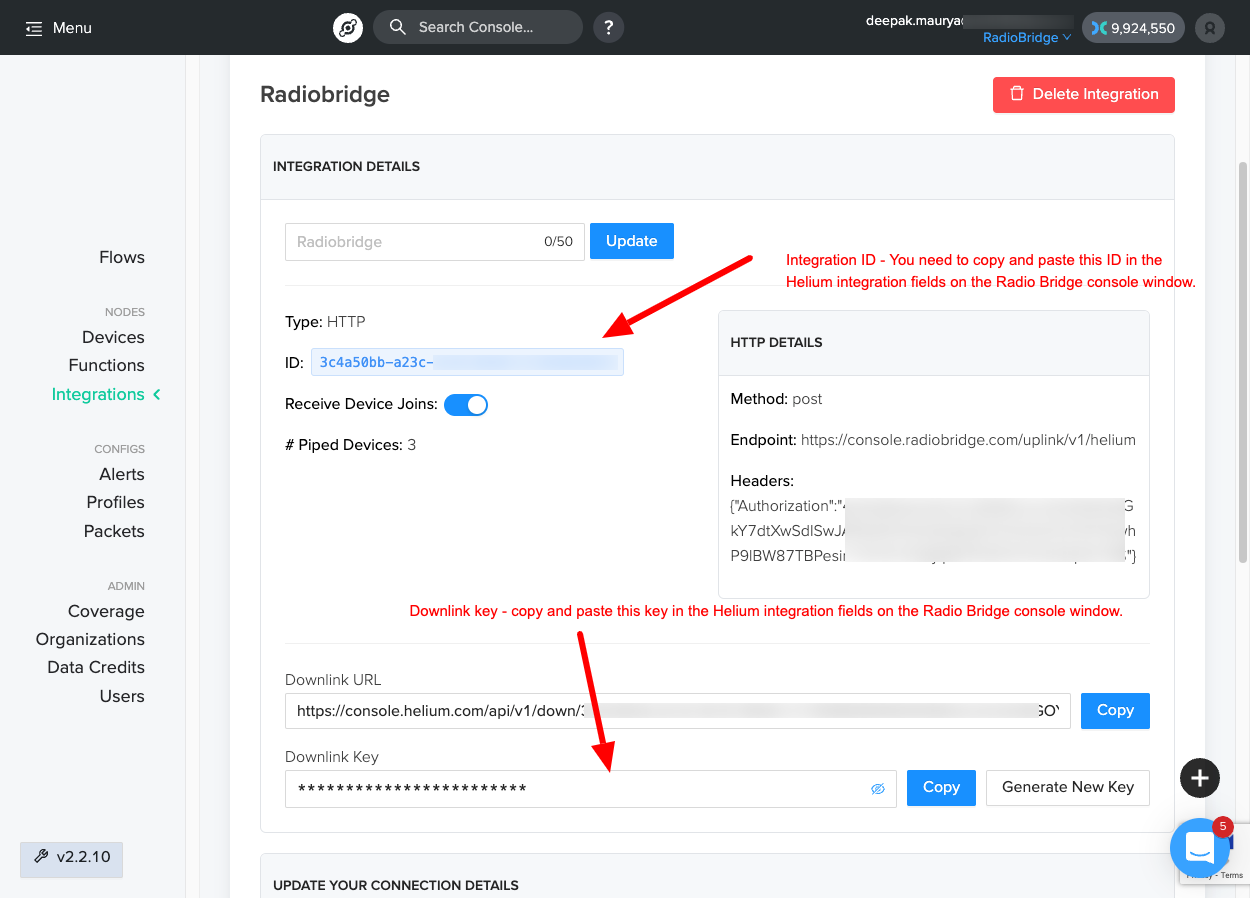
# Configure Integrations
Back in the Radio Bridge Console, Fill in the API Key, Integration ID and Donwlink key from Helium console window. click on “Refresh Dropdowns” and you will see the "Label" displayed as shown below.
# Add Devices to Console
Your Radio Bridge Console should now be connected to your Helium account. When you add devices in the Console, select Helium and add the device. Adding and deleting devices in the Console will now be reflected in your Helium account, and messages coming through Helium will appear in the Console.