# Kerlink Wanesy Management Center (WMC)
The Wanesy Management Center from Kerlink is a LoRaWAN connectivity service. The Kerlink network server is located in the cloud, and the Kerlink gateways forward packets between the network server and the LoRaWAN sensors.
# Registering Devices through Wanesy
The easiest way to add devices is to let Radio Bridge register them for you. In this scenario, you don’t need your own Wanesy account.
Simply log into the Radio Bridge console and select the Devices tab on the left side of the page and click “Add New Device”. From there select the Kerlink icon and then “Register through Radio Bridge”.
# Add Your Kerlink Gateway
In addition to registering devices through the console, you must also register your gateway to create coverage. Note that this section describes adding your gateway through Radio Bridge, and not with your own WMC account. First you need to Setup the Kerlink Gateway to Connect it with Wanesy Management Center. Please follow the steps below to configure your Gateway.
# Update Gateway Firmware
To update the gateway, first ensure the gateway is connected to the local network.
Open a web browser and enter the IP assigned by your router.
On the login screen, the default admin login username is admin and the password is also admin. In the latest version, the default username is admin and the password is pwd4admin
To update the firmware, please click the link below to find the latest firmware version available to download
https://wikikerlink.fr/wirnet-productline/doku.php?id=wiki:firmware:lastversion (opens new window)
NOTE
Wikikerlink.fr website is protected using a username and password, If you don’t have an account then you need to request support@kerlink.fr to get your account.
- To run the upgrade, you will need to login into your Gateway terminal using SSH. The default username is root and password is a combination of
pdmk-<last 6 chars of gateway Board ID>
For example: If your gateway Board ID is XXXAPa010X9A, then password will be pdmk-010X9A
Create the updates folder if that doesn’t exist
# mkdir /user/.updatesCopy the downloaded firmware using SCP command in the /user/.updates folder
# scp keros_2.4.0..ipk root@<ip_address>:/user/.updates/Trigger the update for next reboot
# kerosd -uReboot the device.
# rebootYou can find more details using the link below https://wikikerlink.fr/wirnet-ifemtocell/doku.php?id=wirnet-ifemtocell:software_updates (opens new window)
# Configure using the Magic Link
Request a “magic link” from Kerlink support to finish the configuration to connect the Gateway with WMC panel. You will need to send an email to support@kerlink.fr with your Kerlink Gateway Serial number to activate the Gateway and generate a magic link. The magic link is an executable file, which configures everything in the gateway and enables Gateway to connect with WMC Network.
# Add the Gateway
Go to the Gateways tab on the left side of the Radio Bridge Console, click Add New Gateway, and select the supported gateway you wish to use. You can follow the below guide to finish the gateway registration.
Enter any name for your Kerlink Gateway.
You can obtain Kerlink Gateway EUI using below method:
Wirnet iBTS : 7276FF002E<last 6 characters of the CPU serial number>Wirnet Station : 7276FF000<last 7 characters of the station barcode>Wirnet iFemtoCell : 7276FF00<last 8 characters of the CPU board serial number>If you are using iFemtoCell then you can find the EUI using below command.
a. First login into Gateway console using SSH.
b. Type the below command which will retrieve the EUI for your Gateway.
`cat /tmp/board_info.json | grep -i eui`c. Output will look like
`"EUI64": "7076FF0054040166"`,d. Your EUI is “7076FF0054040166”, Copy that and put it into console.
Fill in other fields and click “Register Gateway”
You should see a successful message and gateway should connect with the Wanesy network in few mins. Gateway will blink as soon as it will connect with the Network. You can now add new Radio Bridge devices and begin receiving data in the Radio Bridge console.
# Using your Wanesy Management Center account
If you are planning to use your own WMC account, this section shows how to link your WMC back end to the Radio Bridge Console.
# Integrate your WMC Account
Go to the Integrations page in your Radio Bridge account, Click Kerlink to configure the network. Enter your Wanesy Management Center username and password to connect the WMC portal with Radio Bridge
# Push Configuration
The Push Configuration allows WMC to push the uplink events to the Radio Bridge Console. Login into your Wanesy account, navigate to the Administration -> Clusters -> Click Push Configurations
Note: It is important for you to configure the push configuration correctly, otherwise it may function incorrectly.
- Enter the Configuration name (It can be anything)
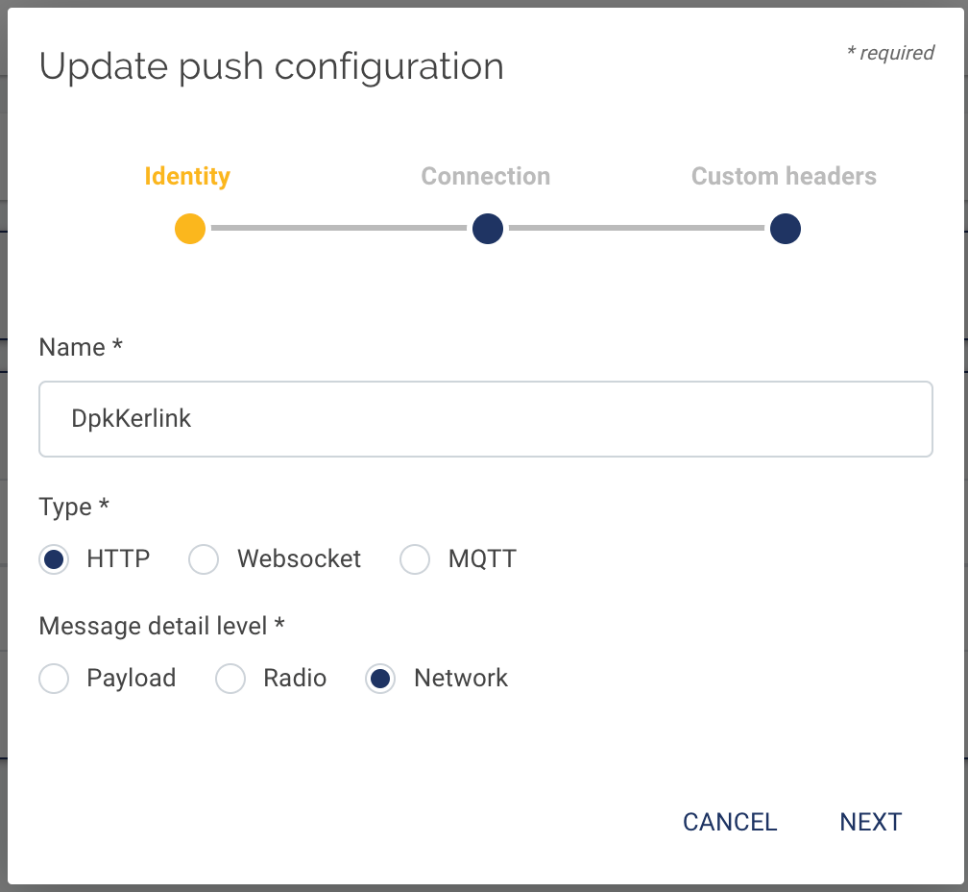
- Select the Type “HTTP”, Message detail level should be “Network”
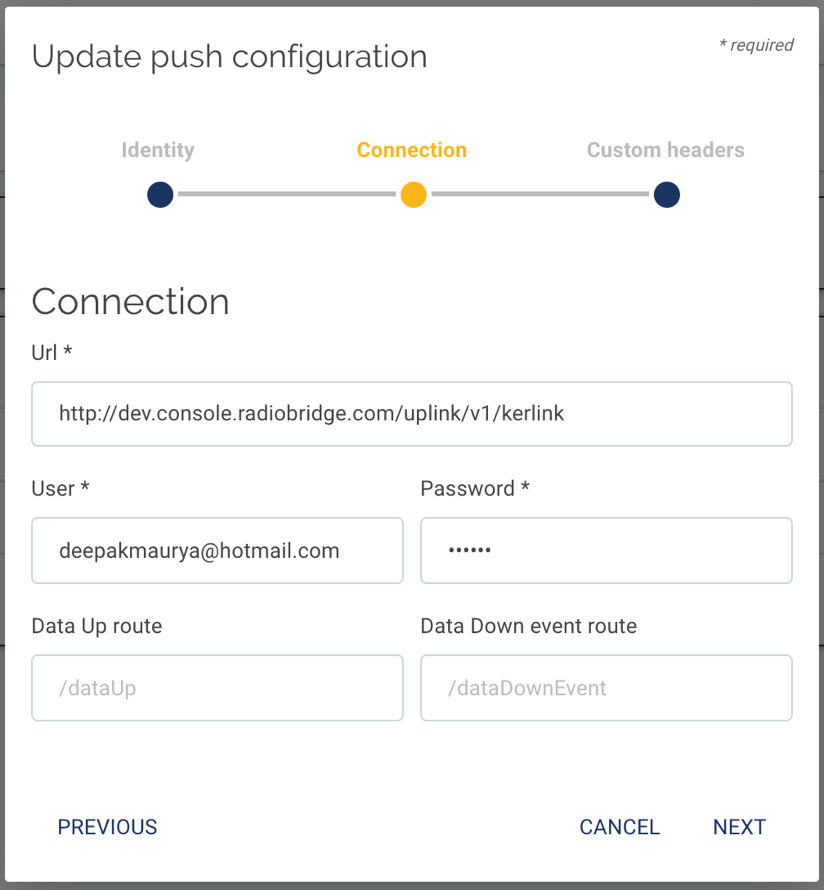
- Copy the URL from the Kerlink Integrations page and setup as shown in the image below.
You need to enter your Radio Bridge account username and password for the authentication.
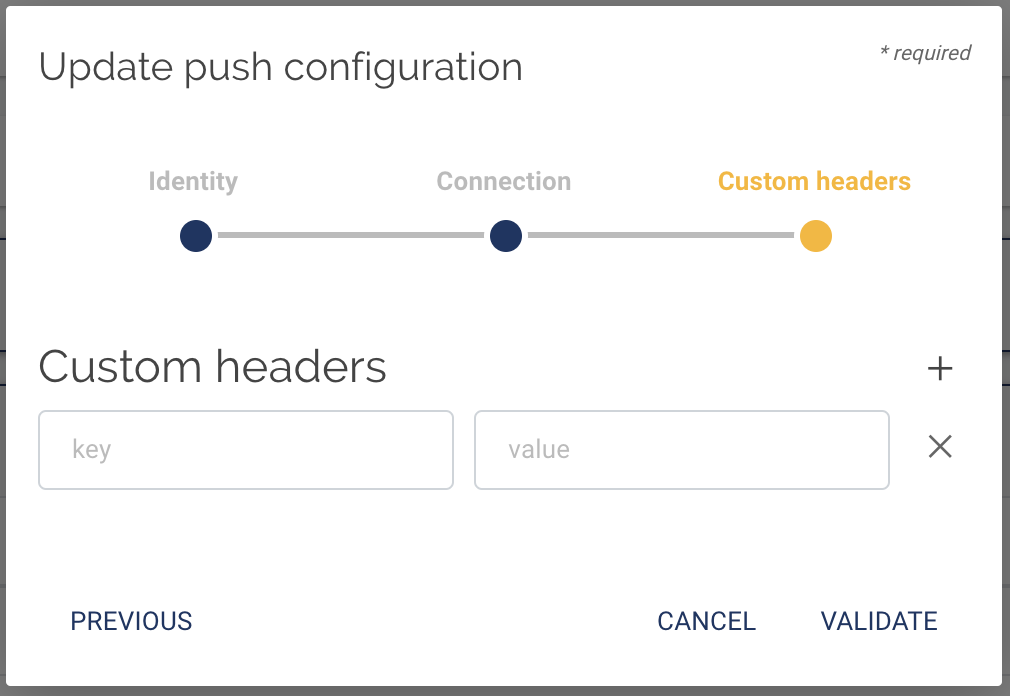
Click Next, Skip the Headers section, and click Validate to finish the setup.
# Clusters
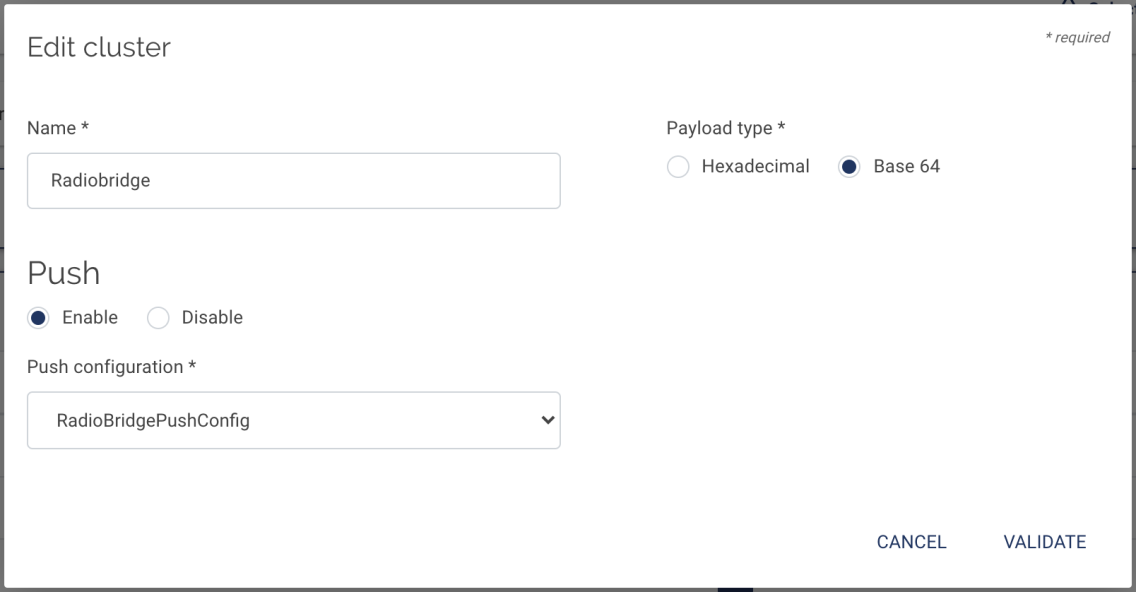
Each device in your account belongs to a Cluster and Cluster defines the way you can route your data using Push Configuration and Payload type. If you already have a cluster then you can edit that and update the configuration as per below screenshot. Or if you don’t have then please create the new cluster as per below instructions:
- Click the Add Cluster/Edit Cluster button to add/edit the cluster.
- Enter any name and Choose the Payload Type as Base 64
- Enable the push configuration
- Choose the Push Configuration created in Push Configuration
- Click Validate to save the cluster.
- In the console please make sure you choose the same cluster on Integrations Page.
# Add Devices to Console
Your Radio Bridge Console should now be connected to your WMC account. When you add devices in the Console, select Kerlink and add the device. Adding and deleting devices in the Console will now be reflected in your WMC Kerlink account, and messages coming through WMC will appear in the Console.