# Senet
Senet is a LoRaWAN connectivity service. The Senet network server is located in the cloud, and Senet-enabled gateways forward packets between the network server and the LoRaWAN sensors.
# Registering Devices through Radio Bridge
The easiest way to add Senet devices is to purchase service through Radio Bridge and let the Radio Bridge console handle the provisioning automatically. In this scenario, you don’t need your own Senet account or a direct engagement with Senet.
Simply log into the Radio Bridge console and select the Devices tab on the left side of the page and click “Add New Device”. From there select the Senet icon and then “Register through Radio Bridge”. Once the device has been added, your Radio Bridge sensors will connect through the Senet network and you will see new messages appear in the console.
# Using Your Senet Account
If using your own Senet account is required, this section shows how to link your Senet back-end to the Radio Bridge Console. To setup your Senet account, you will need API Key, APP EUI, Join EUI, Contract ID, and Profile ID as described in the next sections.
# Request API Key
First you need to request the API key from Senet support. Send an email to support@senetco.com to request the API key for your account.
# AppEUI
The default Radio Bridge AppEUI is defined in the section on AppEUI/JoinEUI above. This AppEUI can be programmed to a custom value in the factory, and in the Senet back-end you can find the AppEUI assigned to your account as shown in below image.
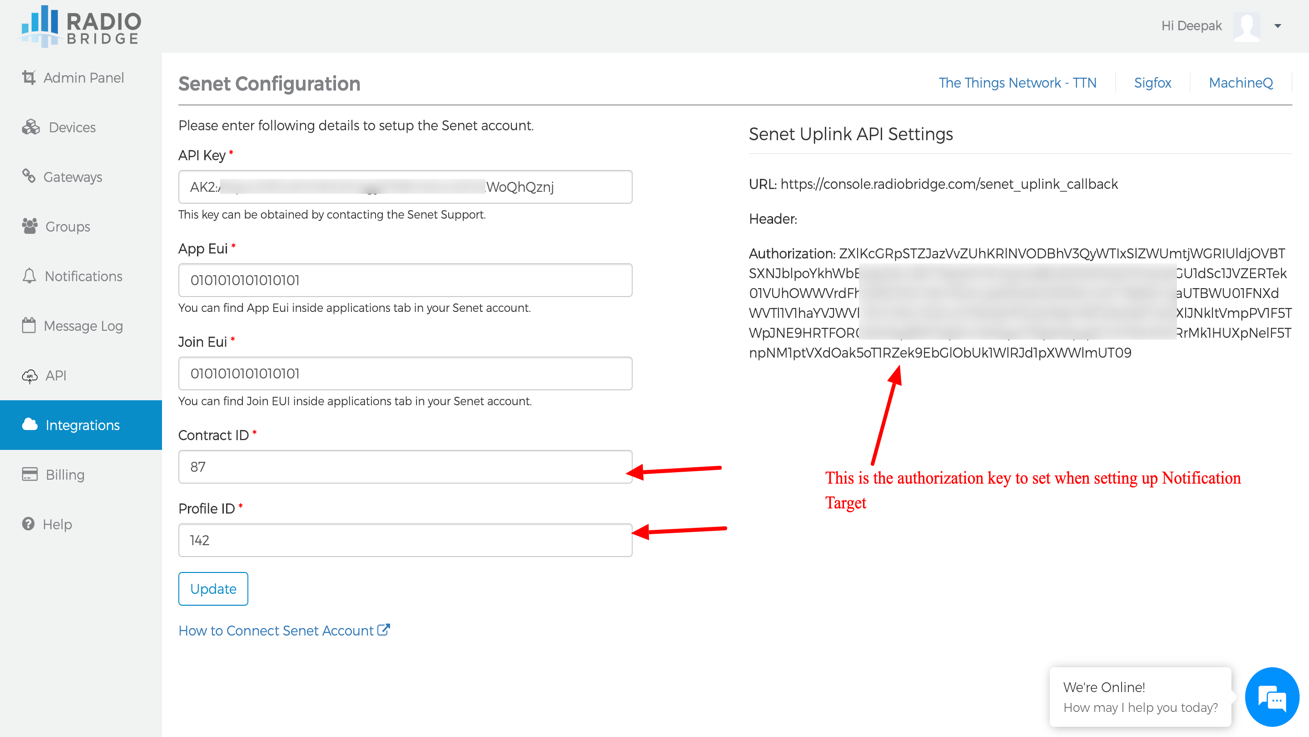
# Contract Id & Profile Id
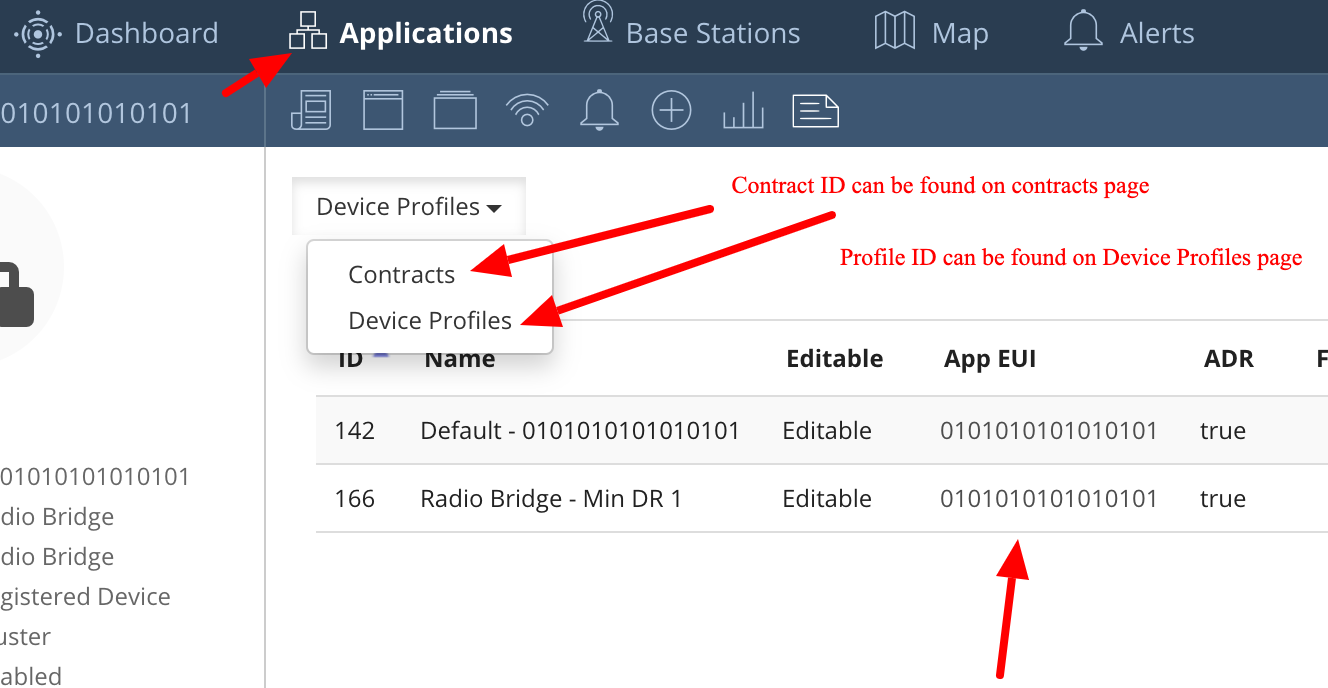
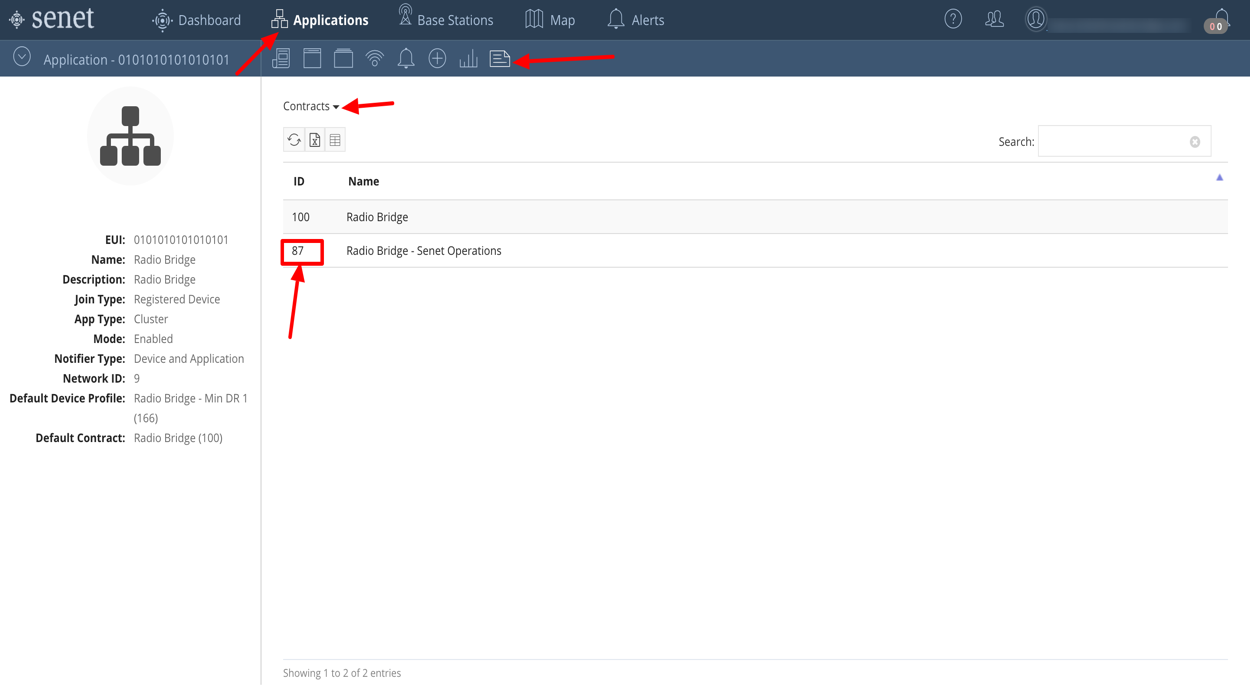
You can find the contract ID and profile ID through Applications tab, please see the image below to find the contract id and profile id.
# Notification Target
To receive messages in the console, you will need to set the notification target in the Senet back-end to point to the Radio Bridge console. You can email Senet support to set this for your account.
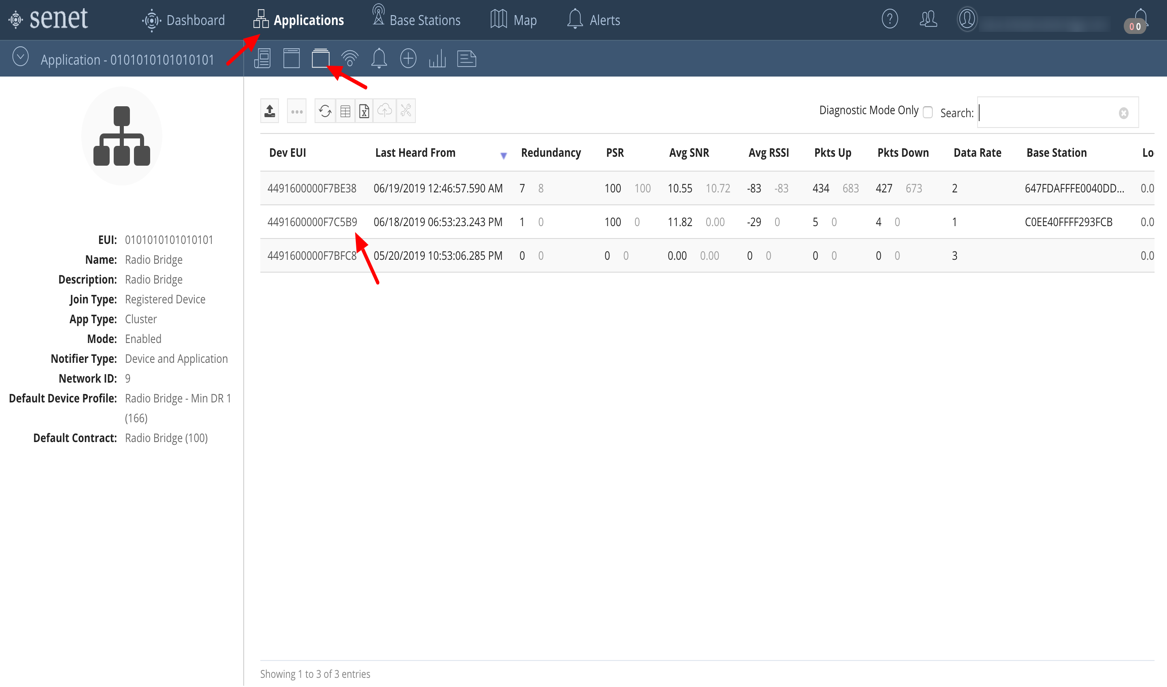
Alternatively, Senet allows to set the notification target for every device individually. To set the notification target for a device, go to the Senet console, click the Applications tab and edit a device to add the notification target. Please follow the screenshots below to set the notification target.

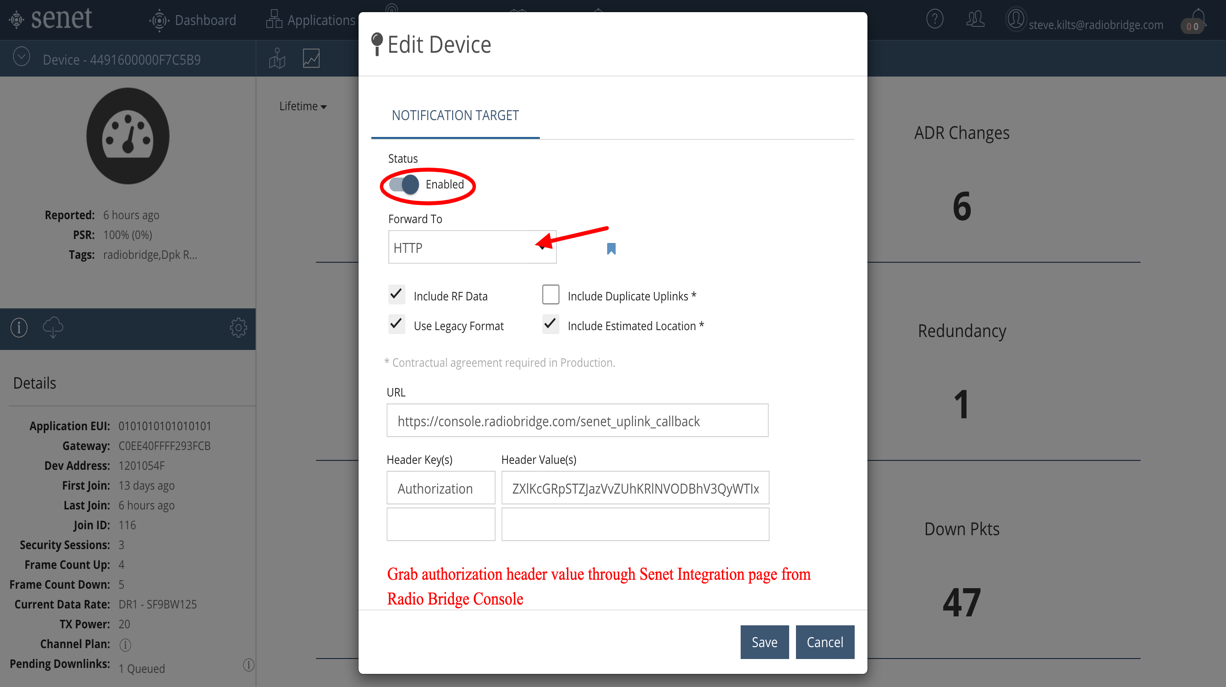
Below image demonstrates the notification target setting, you can find the Header key and value on Radio Bridge Console -> Senet integrations page.
WARNING
⚠️ Normally you do not want to set the notification target on each device. Rather, you should contact Senet and have them set the notification target for your account.
# Senet Configuration on the Radio Bridge Console
To set up Senet on the Radio Bridge console, go to the integrations tab and click Senet. Enter the contract ID and the profile ID into the fields shown below. An authorization header is provided which can be given to Senet when requesting the permanent notification target described in the previous section.
# Add Devices to Console
Your Radio Bridge Console should now be connected to your Senet account. When you add devices in the Console, select Senet and add the device. Adding and deleting devices in the Console will now be reflected in your Senet account, and messages coming through Senet will appear in the Console.