# Loriot
Loriot.io is a LoRaWAN connectivity service. The Loriot.io network server is located in the cloud, and the Loriot enabled gateways forward packets between the network server and the LoRaWAN sensors.
# Registering Devices through Radio Bridge
The easiest way to add devices is to let Radio Bridge register them for you. In this scenario, you don’t need your own Loriot account or a direct engagement with Loriot.
Simply log into the Radio Bridge console and select the Devices tab on the left side of the page and click “Add New Device”. From there select the Loriot icon and then “Register through Radio Bridge”. Once the device has been added, you will see sensor messages appear in the console.
# Optional: Add Your Loriot Gateway
In addition to registering devices through the console, you can also register your gateway if you need to supplement coverage. Note that this section describes adding your gateway through Radio Bridge and not with your own account (which is described in the next section).
Go to the Gateways tab on the left, click Add New Gateway, and select the supported gateway you wish to use. You can follow the prompts to finish the gateway registration. You can now add new Loriot devices and begin receiving data in the Radio Bridge console.
# Using your Loriot.io account
If you are planning to use your own Loriot account, this section shows how to link your Loriot.io back end to the Radio Bridge Console.
# Loriot.io Server Location
First you need to determine your account region, for example: us1, us2 etc. You can find all allowed regions on Loriot login page (https://loriot.io/login.html (opens new window))
# Loriot.io API Key
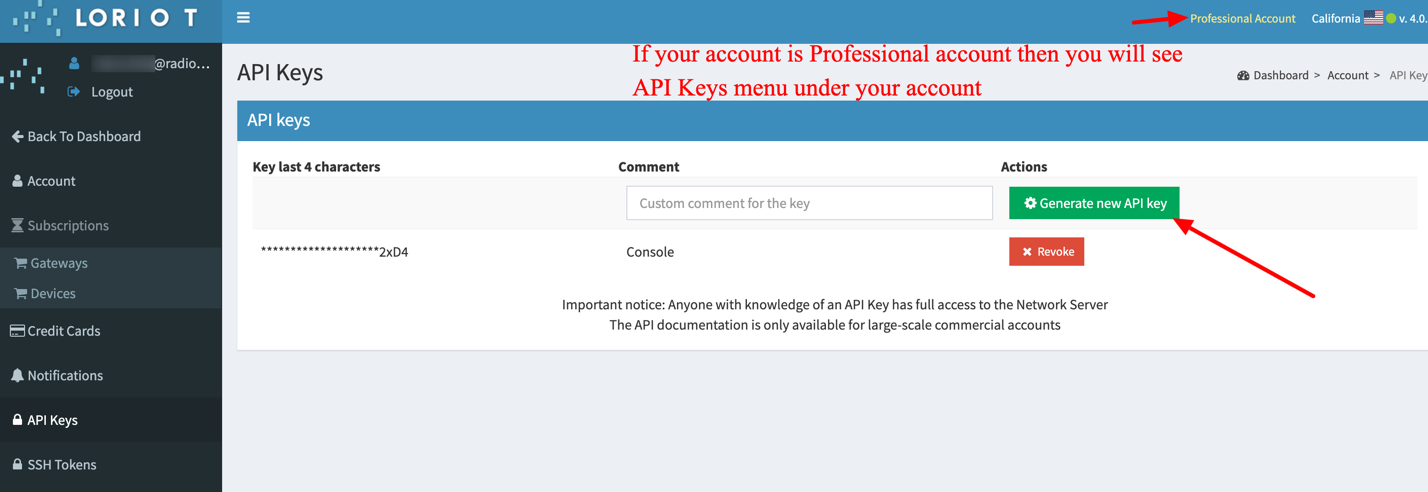
Login into your Loriot.io account, navigate to the Accounts -> API Keys -> Click Generate new API Key.
# Loriot.io Application ID
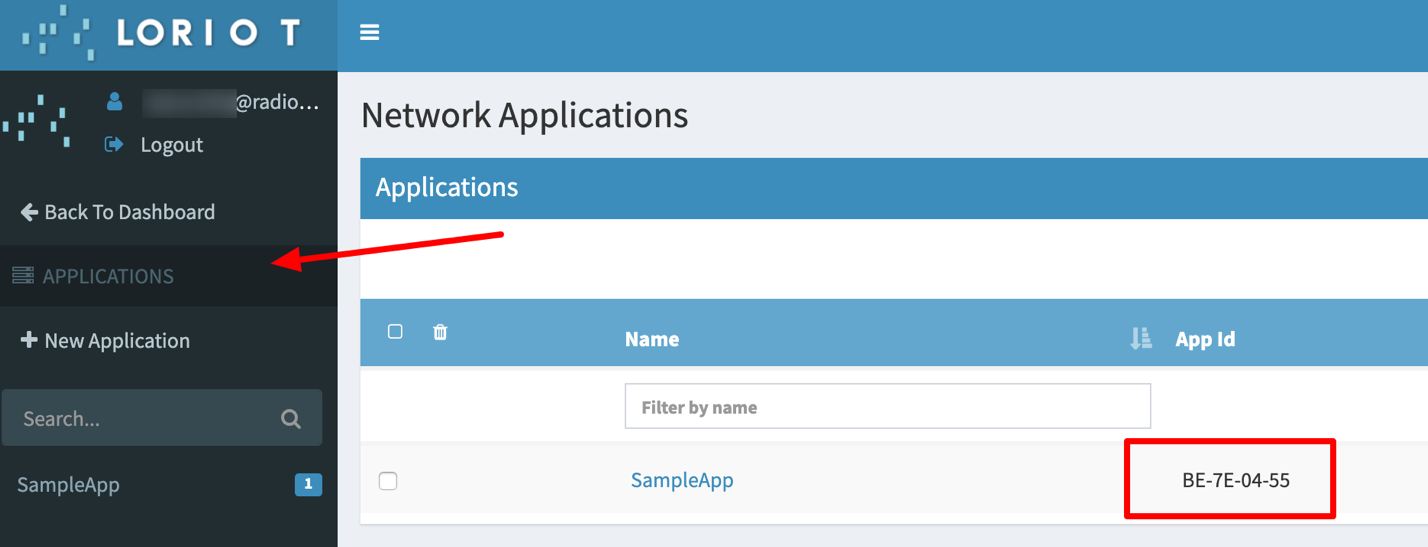
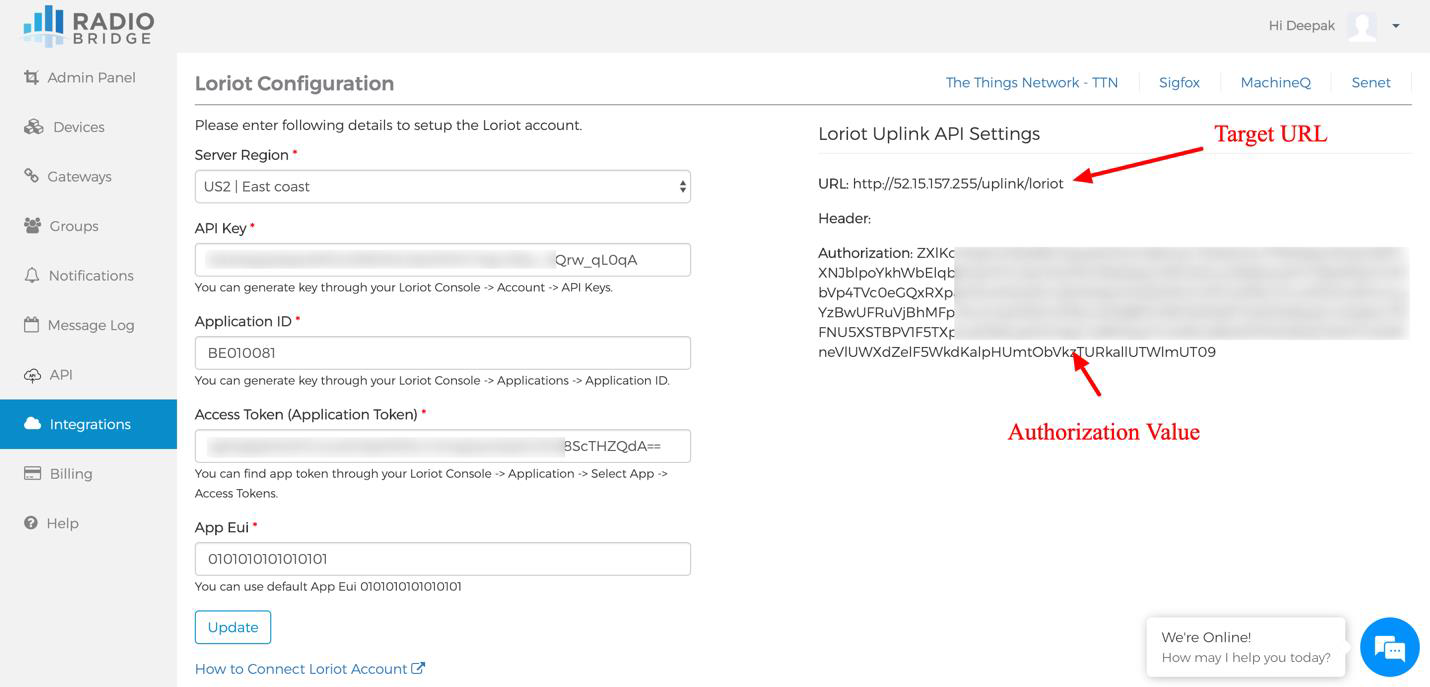
Navigate to Applications -> New Application (If not created) -> Copy the App ID as displayed in below screenshot (note this is different than the LoRaWAN AppEUI). Copy this ID (with no hyphens) to the Radio Bridge console under Integrations -> Setup Loriot.
# Loriot.io Access Token
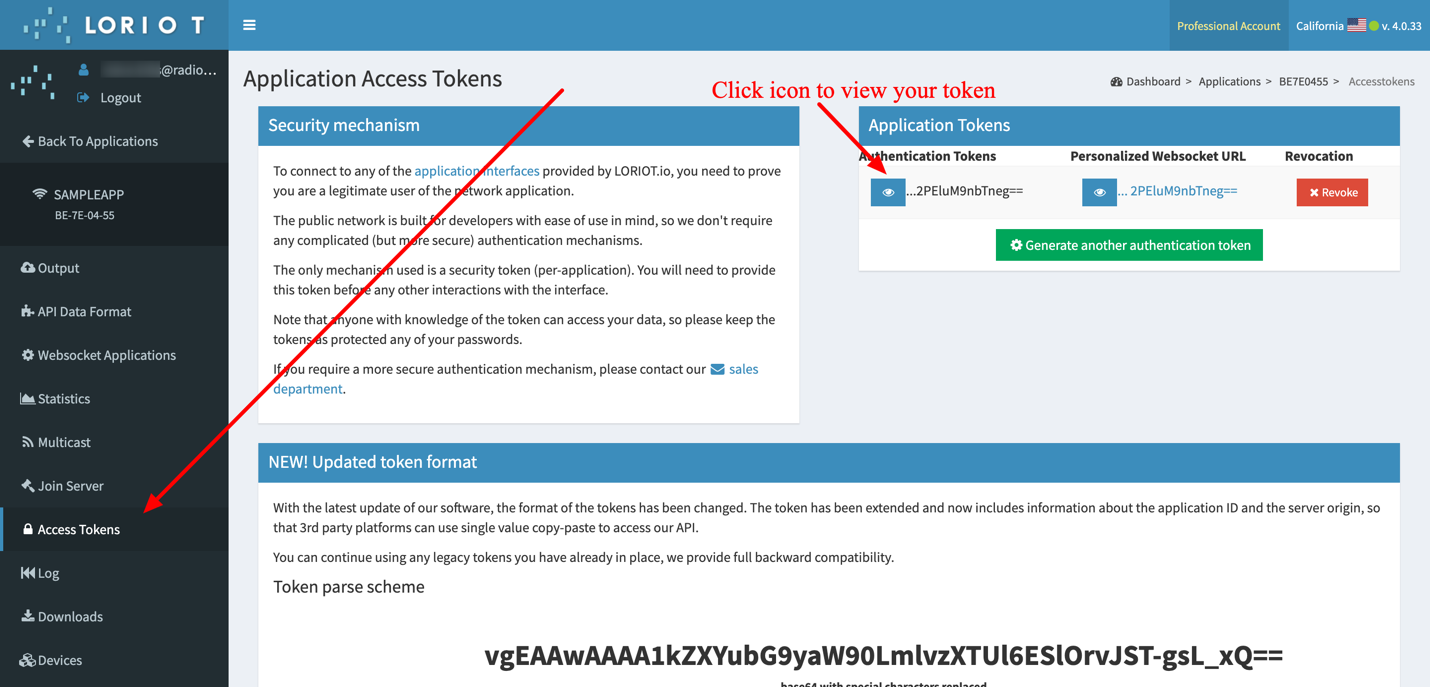
The access token is used to send the downlink config messages to the device & network. Navigate to Loriot Console -> Application -> Select the Application -> Click Access Tokens in left menu. Copy this access token to the Radio Bridge console under Integrations -> Setup Loriot.
# Loriot Output
To receive messages into the Radio Bridge console, you will need to setup the Output as an HTTP Push. The screenshot below shows the steps to add a new Output.
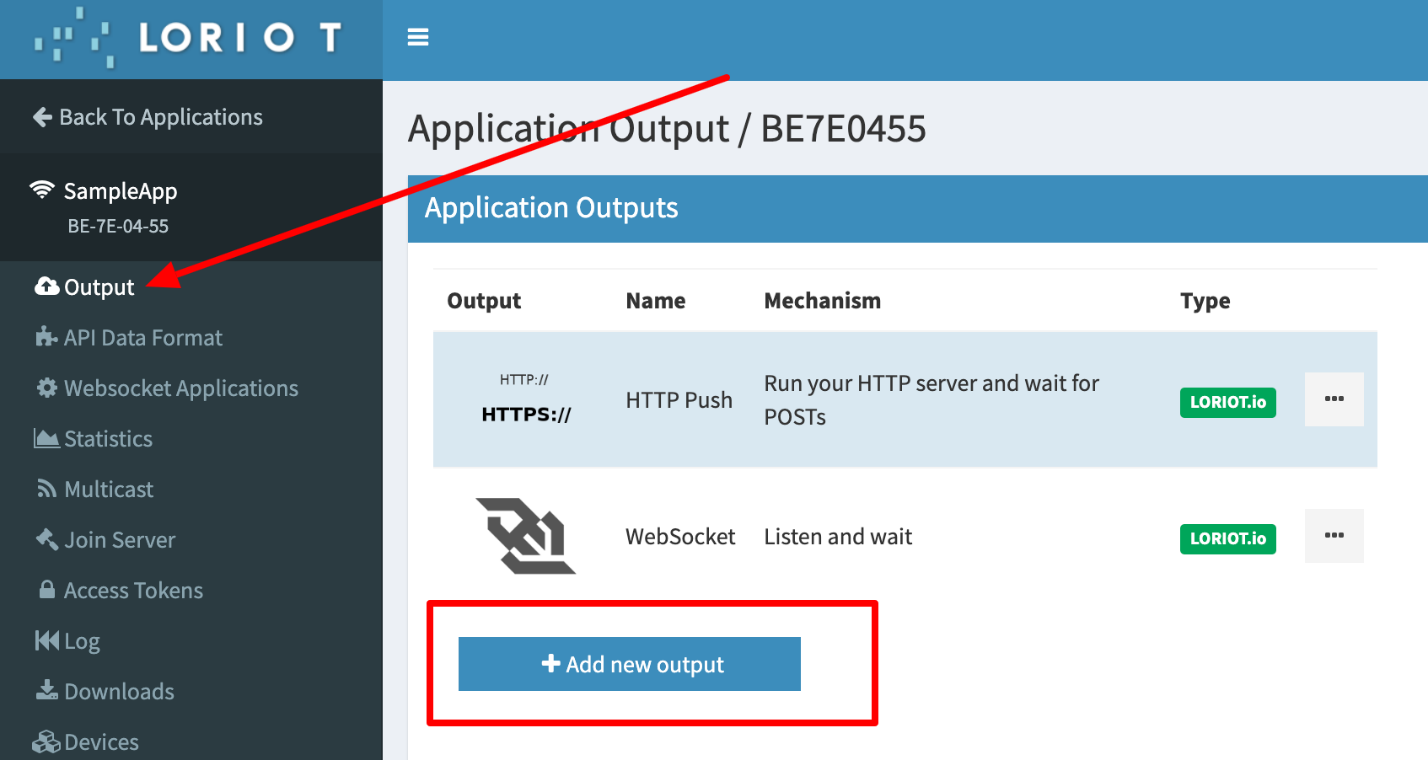
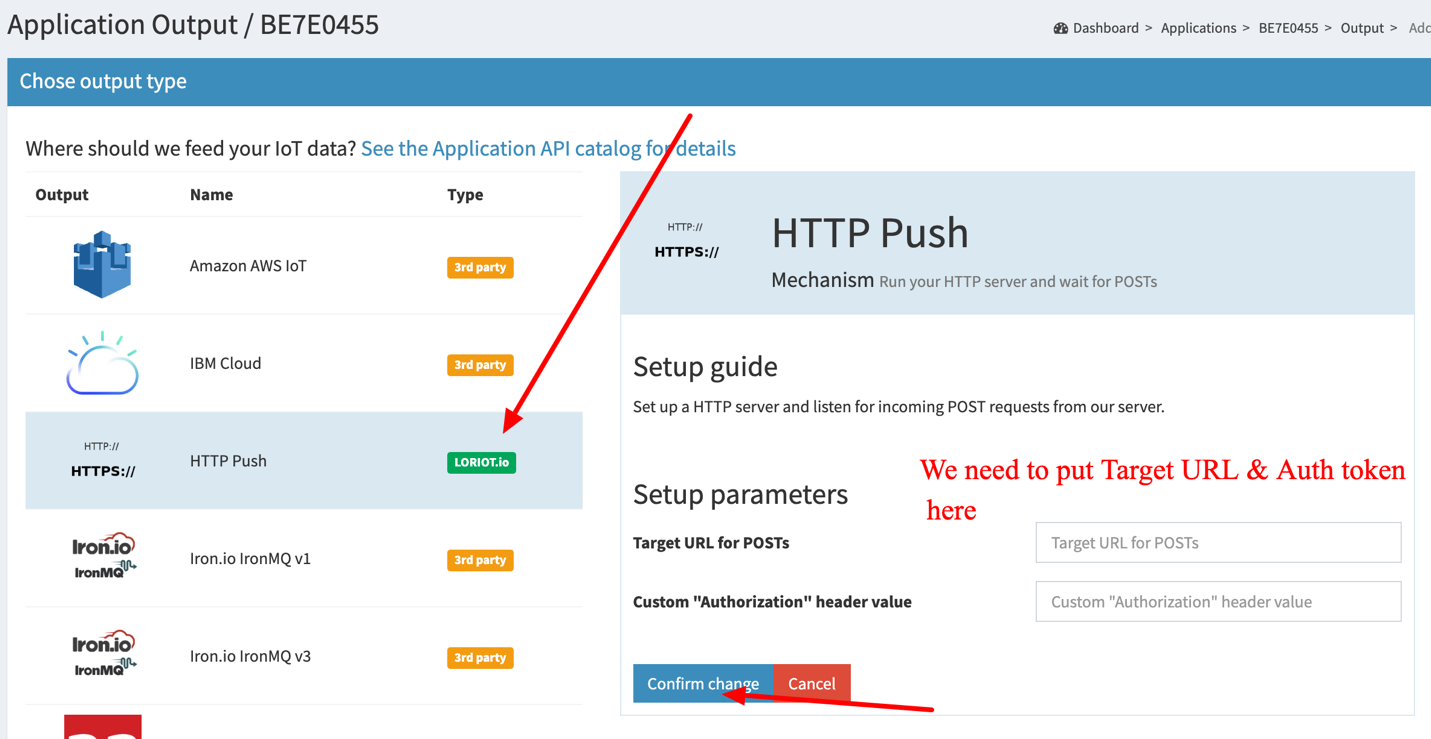
You can find the Target URL and Authorization header value in your Radio Bridge Console under Integrations -> Setup Loriot -> Loriot uplink API. Copy the URL and Authorization value into the HTTP Push configuration window on Loriot.
# Add Devices to Console
Your Radio Bridge Console should now be connected to your Loriot account. When you add devices in the Console, select Loriot and add the device. Adding and deleting devices in the Console will now be reflected in your Loriot account, and messages coming through Loriot will appear in the Console.
